This resource is also available in Spanish
This is a practical, “how to” guide, for beginning seed growers as well as for experienced growers wishing to increase their scale and efficiency of production to medium-large scale seed growing operations. This resource was supported by the Washington State Department of Agriculture Specialty Crop Block Grant.
Have a method or tool you like to use for seed cleaning that you don’t see here? We’d be happy to hear from you and add it to this kit.
Wet Versus Dry Seeded Crops
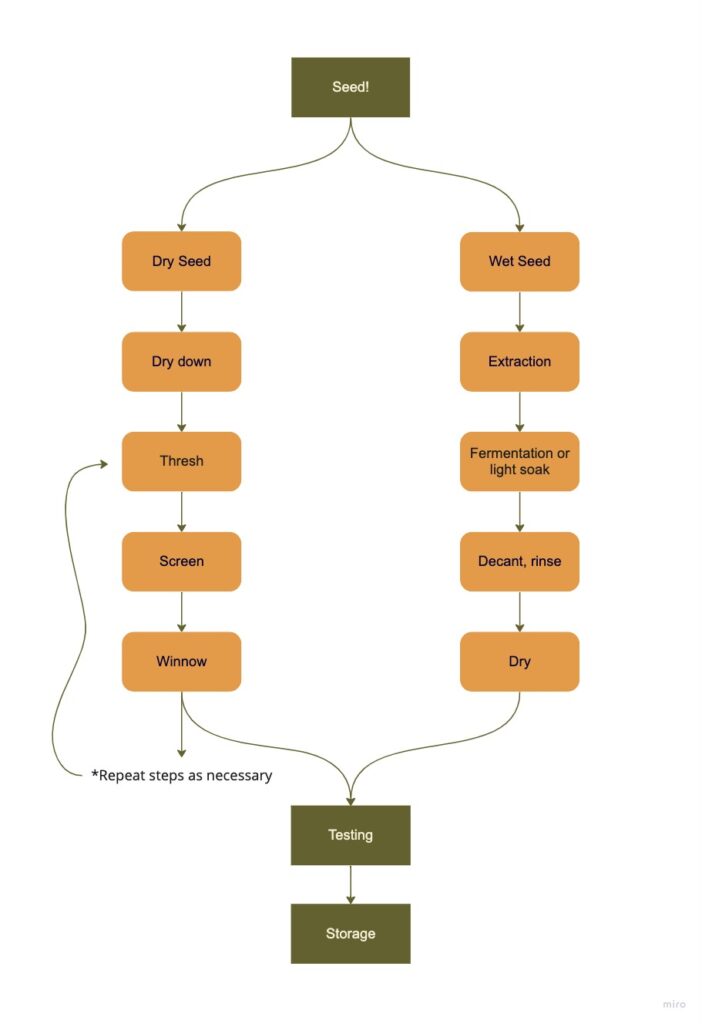
Seed cleaning can be split into two methods: dry and wet processing. A dry seed crop can have husks, pods or seed heads that dry on the plant once mature while a wet seed crop has seeds that are embedded in the flesh of fruits and typically belong to the Solanaceae and Cucurbitaceae family. Although the steps to remove seeds from plant material are similar in each method, wet seed crops require a few additional steps such as fermentation, decanting and rinsing to clean the seed adequately.
Dry Seeded Crops
Step One: Threshing
Once your crop has been harvested and dried, you can begin the first stage of the cleaning process. This step is called “threshing” and involves separating the seed from the rest of the bulk plant material (stems, pods, chaff). Here are some options for threshing techniques and equipment that are suitable for small-scale seed growers:
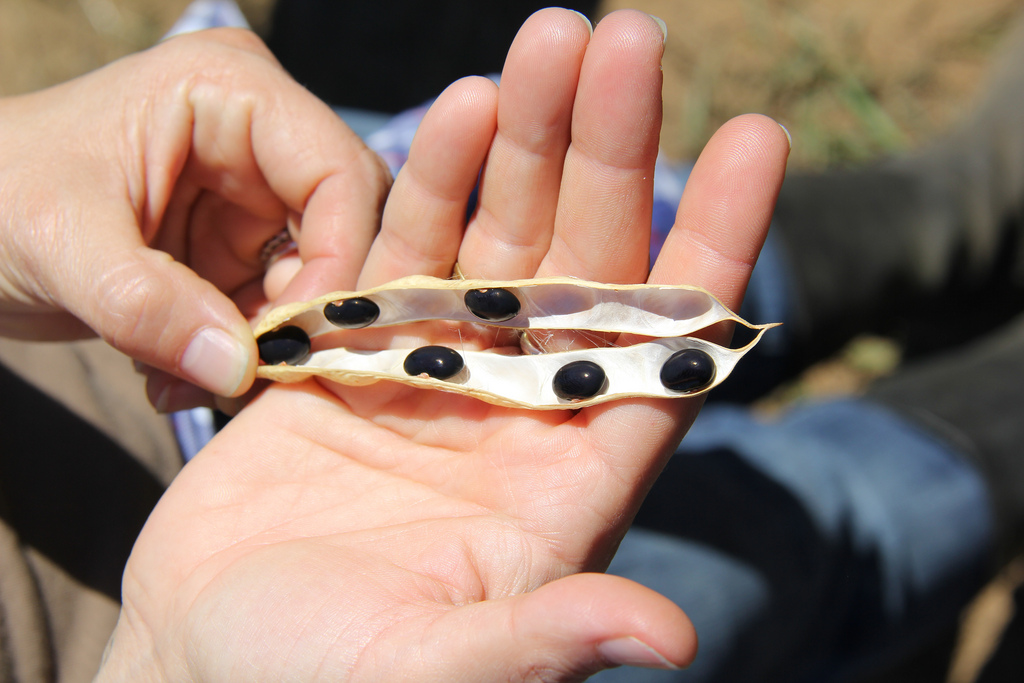
Rubbing by hand
Rub seed pods between your hands to break them open or rub the seed and chaff over a rough surface.
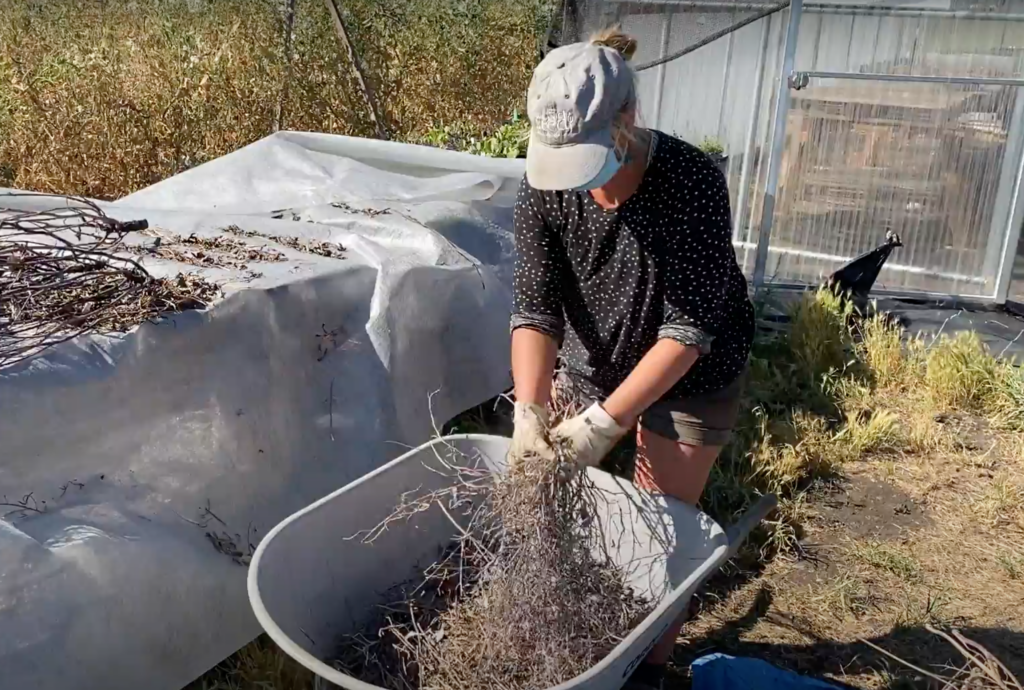
Flailing
Flailing into a trash can or bucket: Hold plant stalk and whack seed head back and forth on the inside of a trash can or bucket to release seed. Once all the pods or seeds are removed, toss the stalk aside.
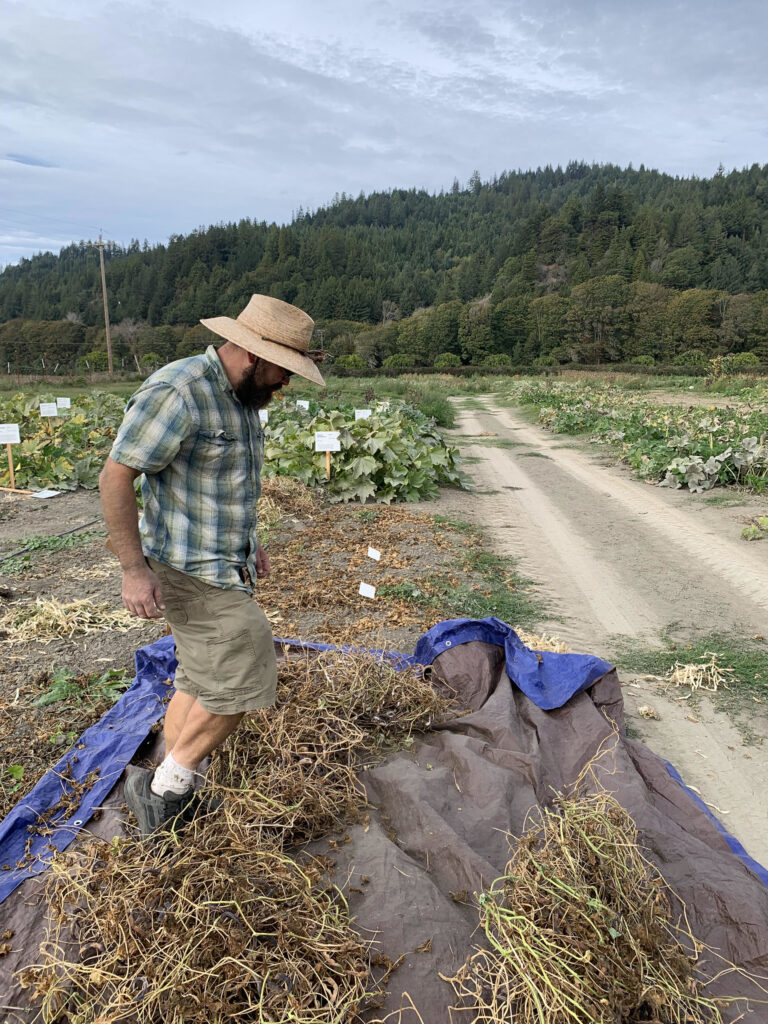
Stomping
Stomping on top of the seed and chaff: Lay the seed and chaff on a tarp, Rubbermaid tote or bucket. Begin walking or stopping on seed to break seed away from pods and plant material. To protect your seed from damage, make sure to always have several inches of seeds and chaff between your foot and the bottom of the bucket or the ground while stomping.
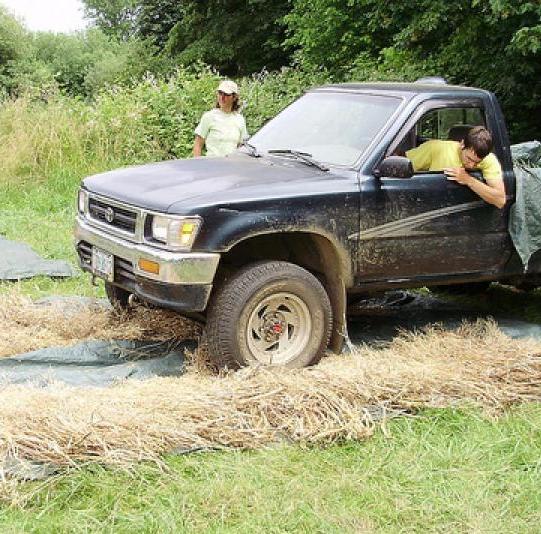
Driving
Lay the seed and plant matter on a tarp and place another tarp on top of the seed. Now drive back and forth and side to side over the tarp. To avoid cracking seed, make sure to test a small batch first to ensure you’re not applying too much pressure and damaging seed. This technique works best if done on soft ground.
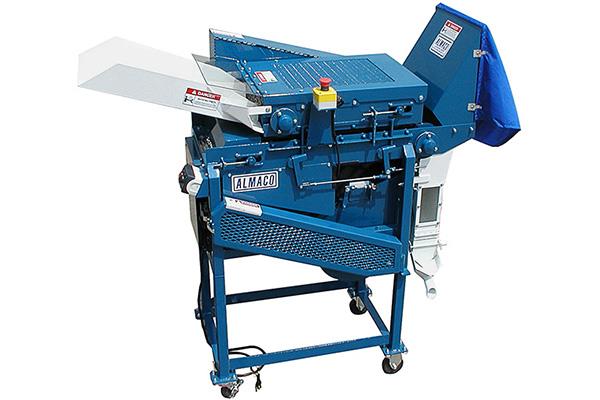
Threshing Machines
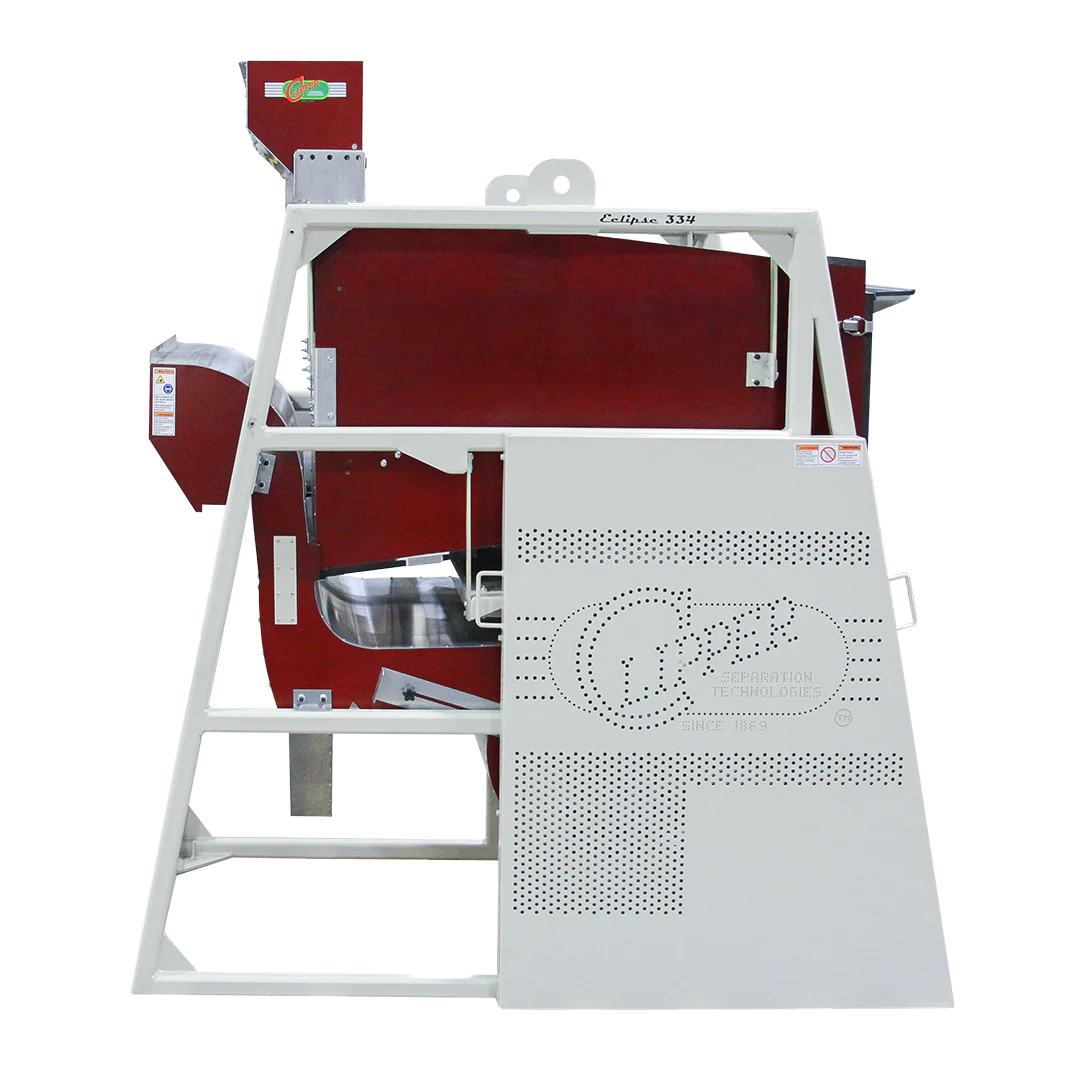
Using a variety of machines: Larger-scale seed growers often use commercial threshing machines such as belt threshers, combines, or mulching equipment to process larger volumes of seed efficiently. Here are some examples of threshing equipment included in the Seed Cleaning Equipment Guide: Almaco Belt Thresher, Combines, and hand cranked threshers.
Step Two: Scalping and screening
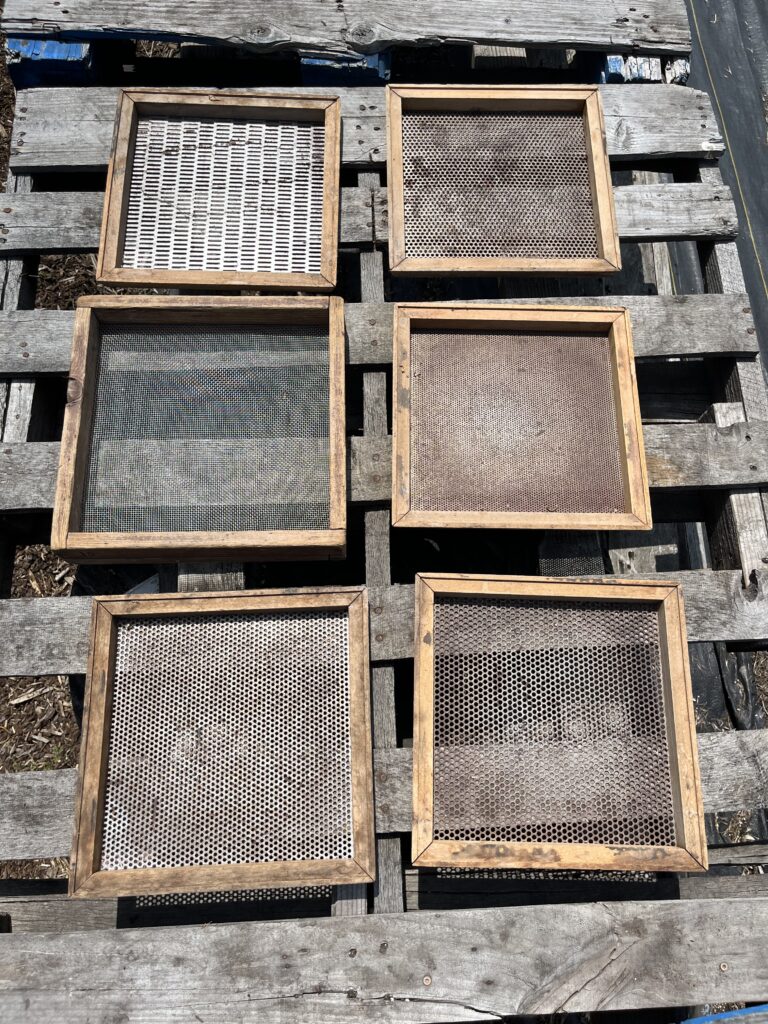
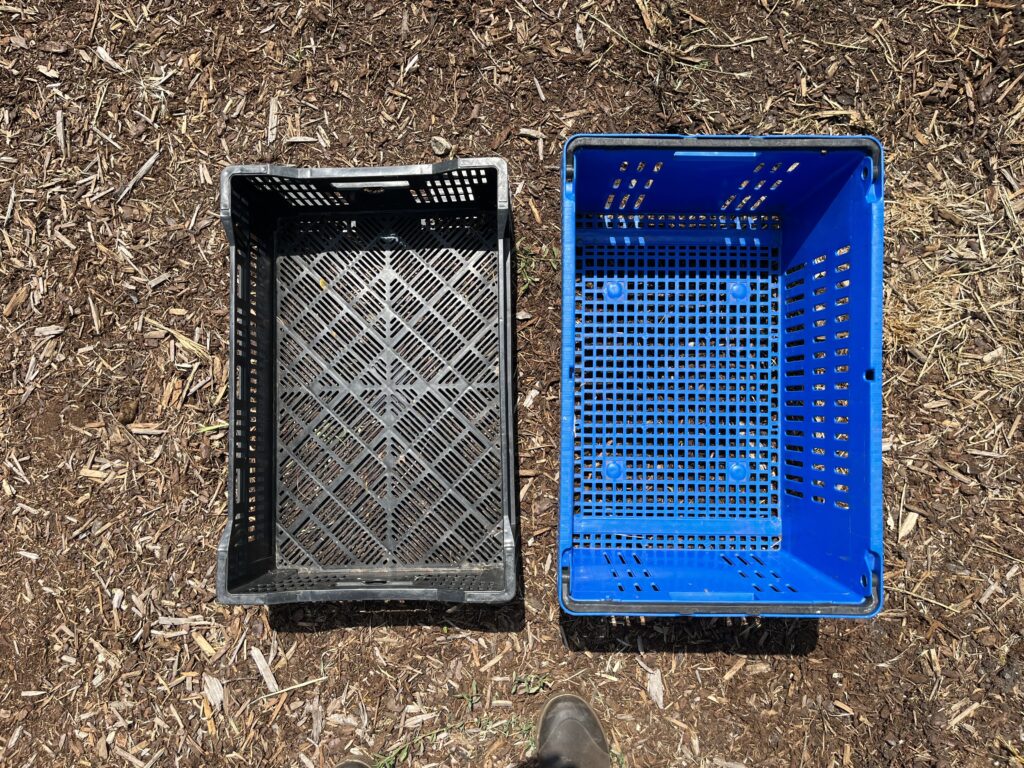
Screening is the process of using screens or crates with various-sized holes to separate seed from remaining plant material. Pour seed and chaff in a thin layer on the screen with the larger holes. Shake and/or gently rub until the seed and any smaller materials have passed through. All the material that is larger than the seed will remain on top and can now be discarded. Next shake and/or gently rub the remaining seed and chaff on the screen with the smaller holes until all materials that are smaller than the seed have passed through. Keep repeating steps while interchanging screens as necessary.
Step Three: Winnowing
Winnowing is the step that uses airflow or wind to separate seed from remaining plant material based on weight. Seed and chaff are dropped before a wind source (either natural wind or a fan) to separate the seed. The heavier material (viable seed) will fall closer to the wind source while lighter materials will be blown away from the seed.
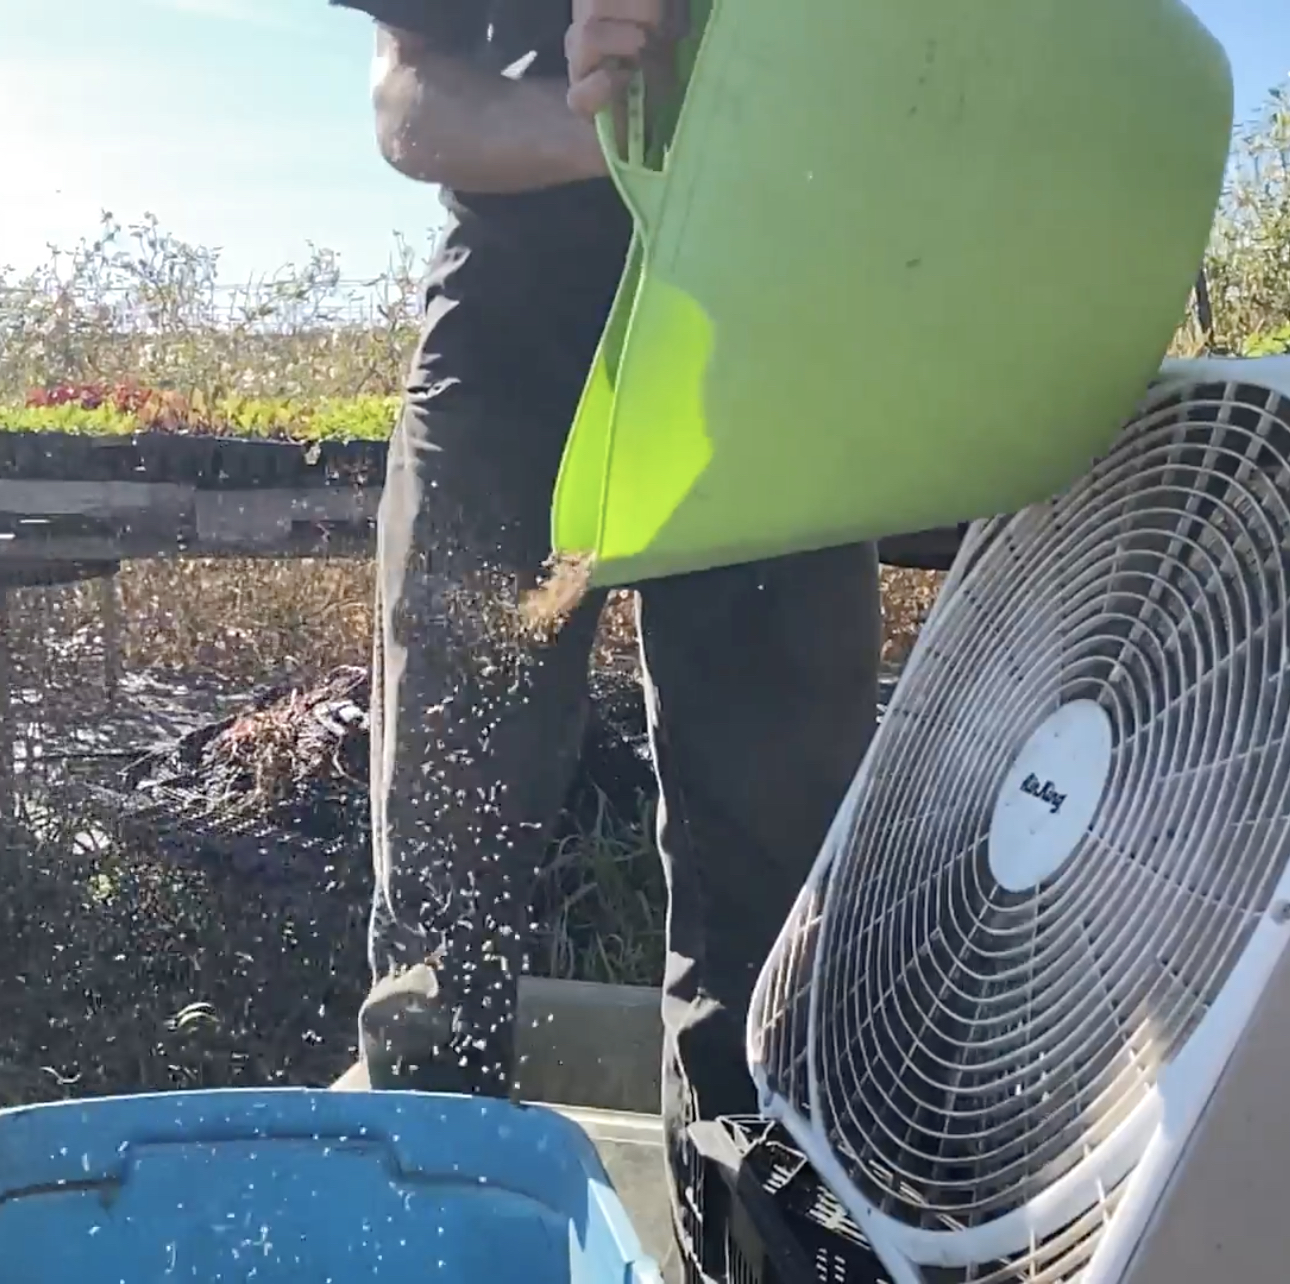
Box Fan Method
Set up a box fan on top of an upside-down tote with two totes placed in front of the fan. Don’t forget to place a tarp underneath your winnowing station to prevent seed loss and to make clean-up faster. When the seed and chaff are poured in front of the fan, the heaviest seed will land in the first tote and lighter seed and chaff will be blown into the second tote or onto the tarp. This process is typically repeated multiple times until the seed looks clean.
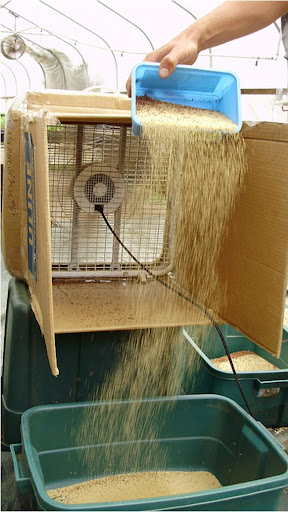
Backwards Fan Method
Set up winnowing station as normal. Slide box fan into a box or create a shield to direct airflow. Turn the box fan backward so the airflow is moving in the opposite direction of your totes. As you winnow, the backward fan will pull the chaff backwards away from the seed instead of forward like in the traditional method.
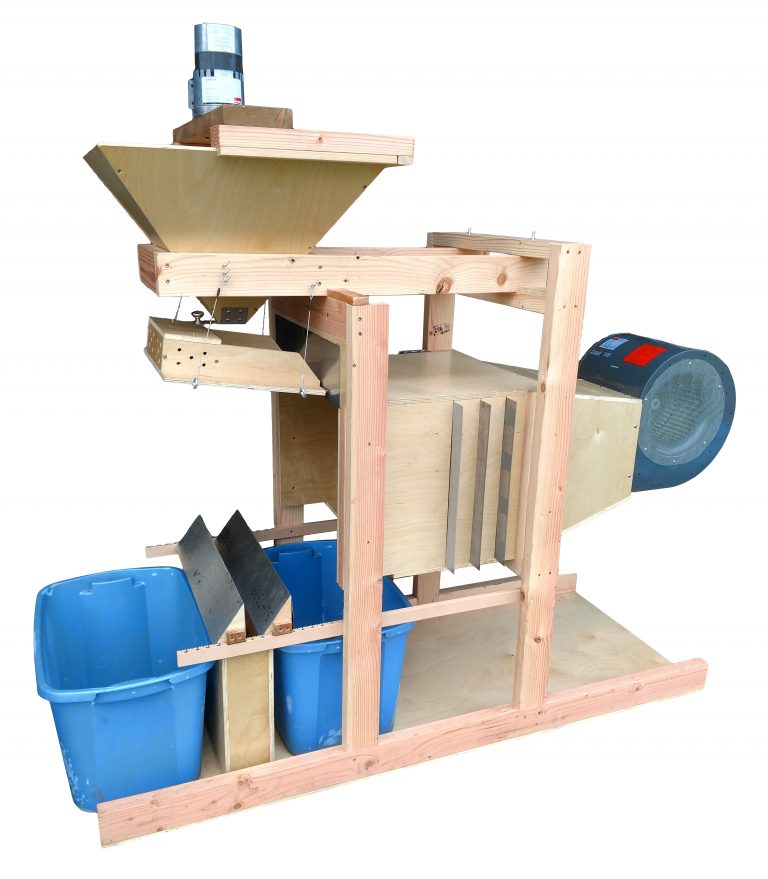
Winnow Wizard
A winnowing machine that can perform precise, density separations to remove immature seeds, chaff material and dirt from seed lots. This piece of equipment comes with various screen sizes that allow you to adjust the airflow and fan speed to accommodate cleaning seeds of all shapes and sizes. You can purchase one pre-built or use open-source plans to build your own.
Step Four: Screen again
After threshing, screening and winnowing your crop it might be beneficial to do one final screening to remove the last bit of dust before packaging.
Wet Seeded Crops
Step One: Extracting seed
The process of removing seed from its fruit can be done in many different ways. Large fruits such as squash and cucumbers are typically cut open so seeds can be scooped out into a container. Smaller fruits, like tomatoes and peppers are usually crushed or mashed whole to release seed from the flesh and pulp.
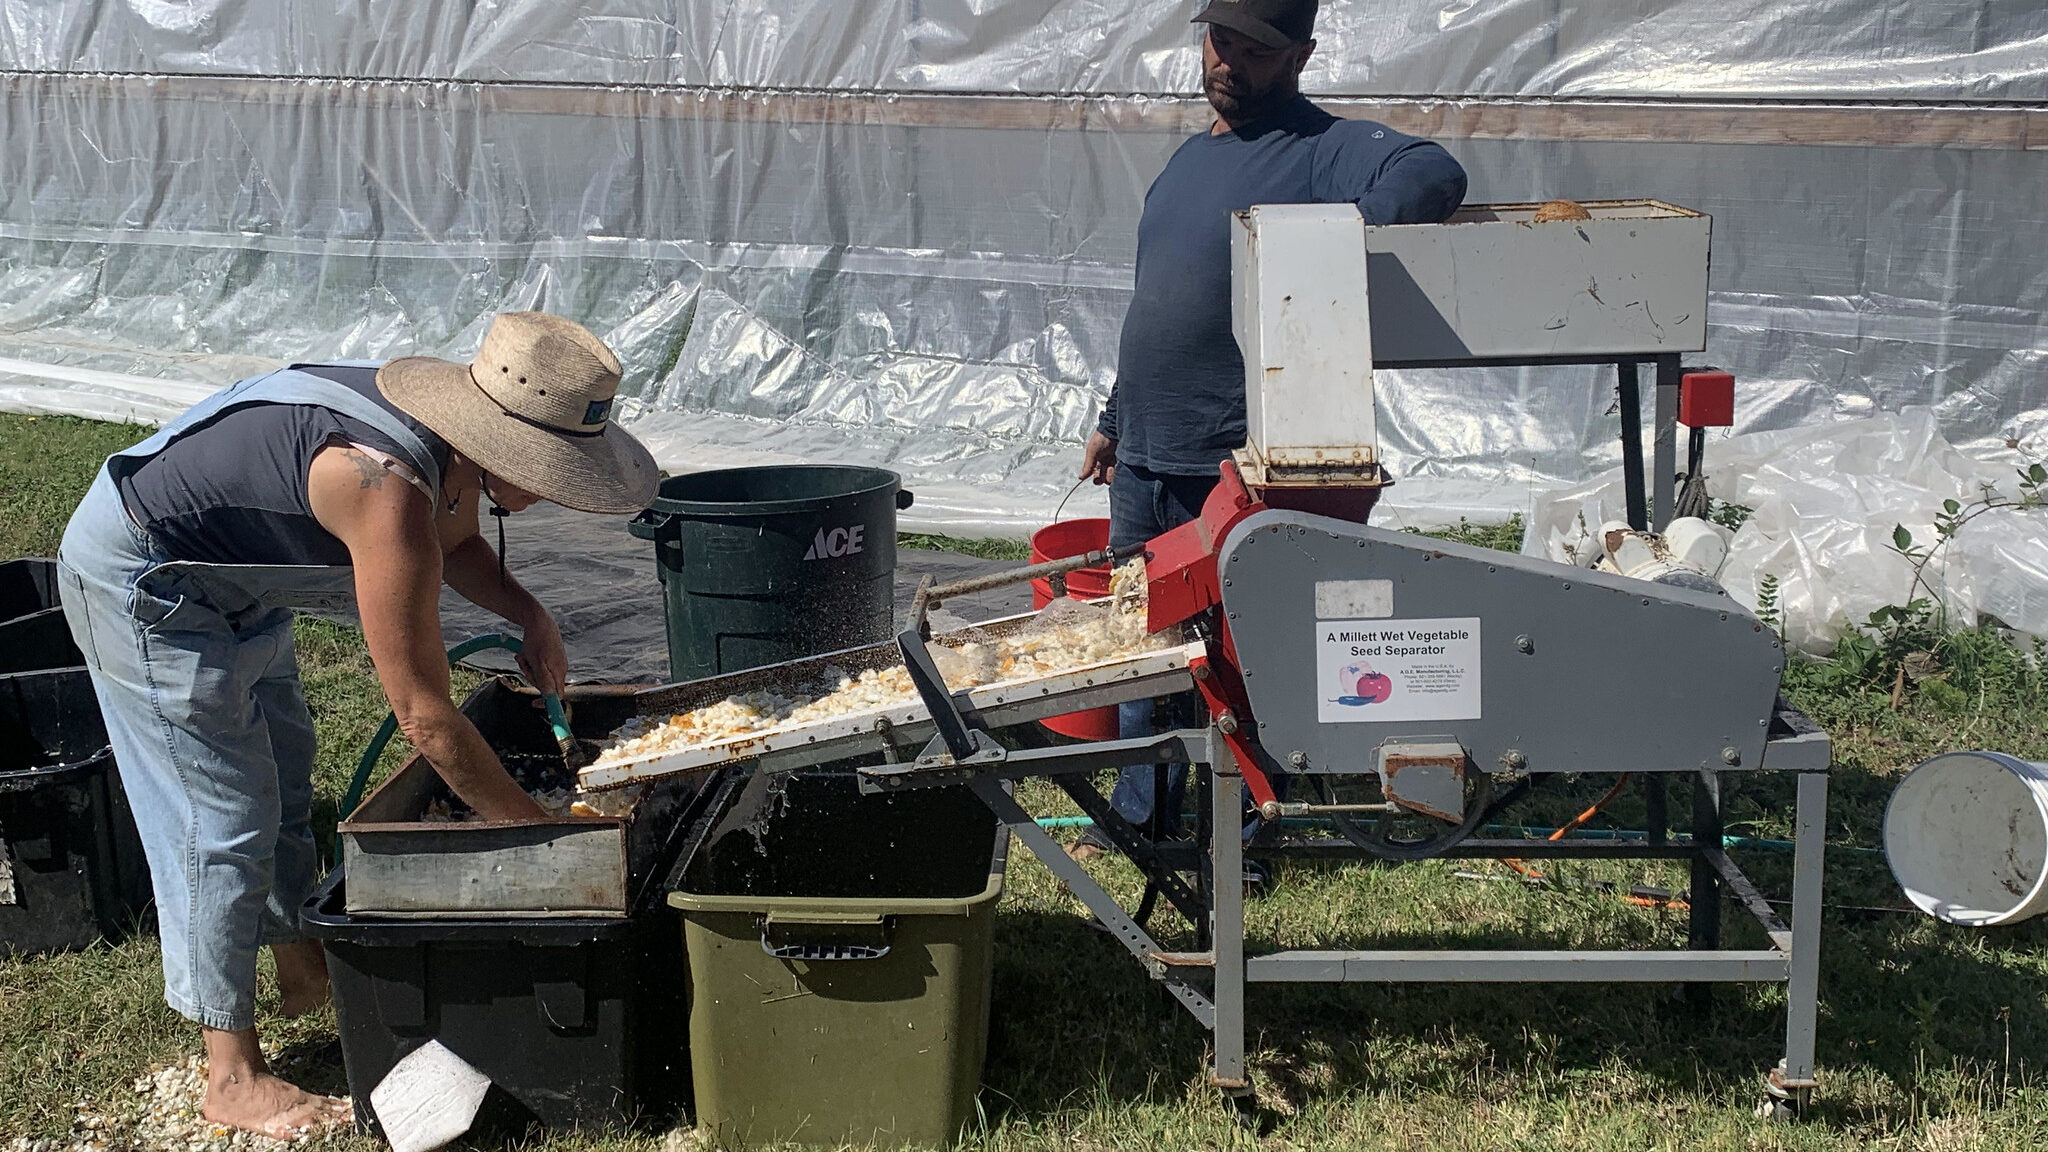
Some popular methods of extraction include:
- Mash into a container by hand using a tool with a wide surface to break up fruit
- Power drill with various paint mixer attachments
- Blender (for small fruits like cherry tomatoes and jalapenos)
- Machete or ax/maul to cut open larger, thick skinned crops. Scoop seeds out with a spoon or tool of choice.
- Use shop vac to suck seeds out of the fruit cavity. This technique is typically used with winter squashes.
- Use a log splitter to cut open larger, thick skinned fruits (zucchini, delicata, pumpkin).
- Vehicle
- Vine crusher
- Wet Millett
Step Two: Fermentation and Soaking
Some wet-seeded crops such as tomatoes and cucumbers require a fermentation period to break down the gelatinous sleeve that encases the seed. This gelatinous cover contains chemicals that prevent seed from germinating inside the fruit and can inhibit germination later on if not removed. Along with removing the gel sleeve, the fermentation process breaks down the pulp/flesh making the seed easier to separate and can destroy seed-borne diseases. Fermentation periods can range from 1 to 3 days depending on your climate. Stir twice a day and when a layer of white/grayish mold forms at the top begin the decanting process. It’s common to do a “light fermentation” or “soak” on other crops like squash and melons to make cleaning more efficient and to mitigate seed-borne diseases.
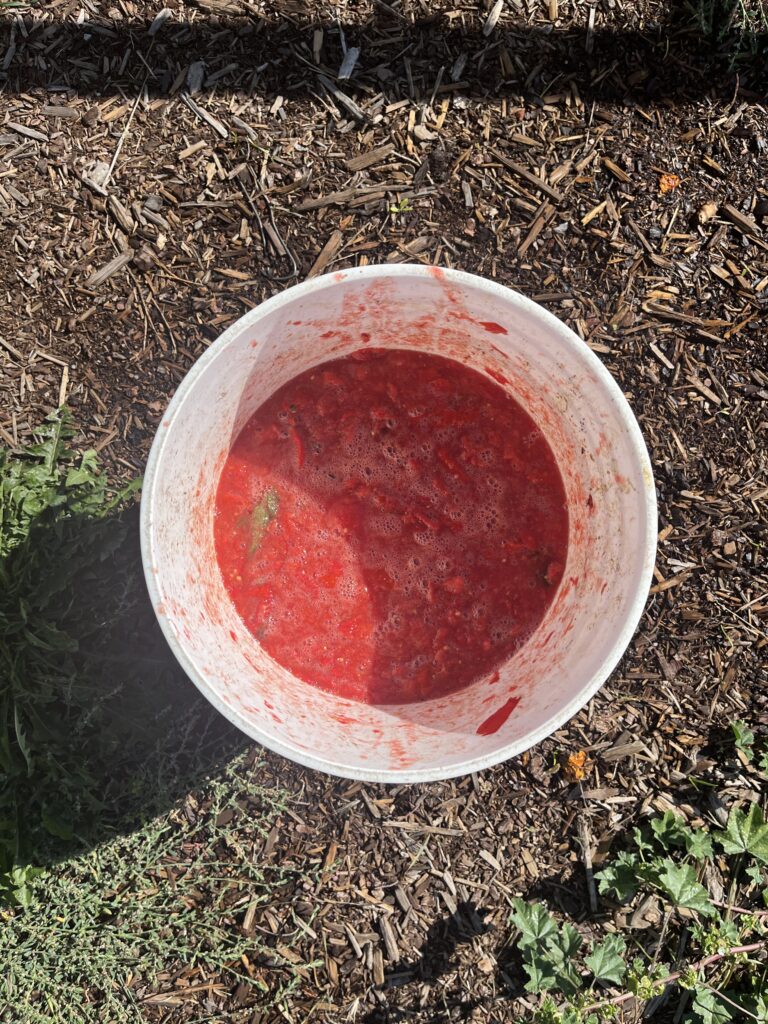
2A: Start Ferment
Place seeds and pulp in a container to begin the fermentation process. Try to avoid adding water to the mixture since it can slow down the fermentation process and cause premature sprouting if not monitored. If you are doing a “light fermentation” or “soak” go ahead and add water.
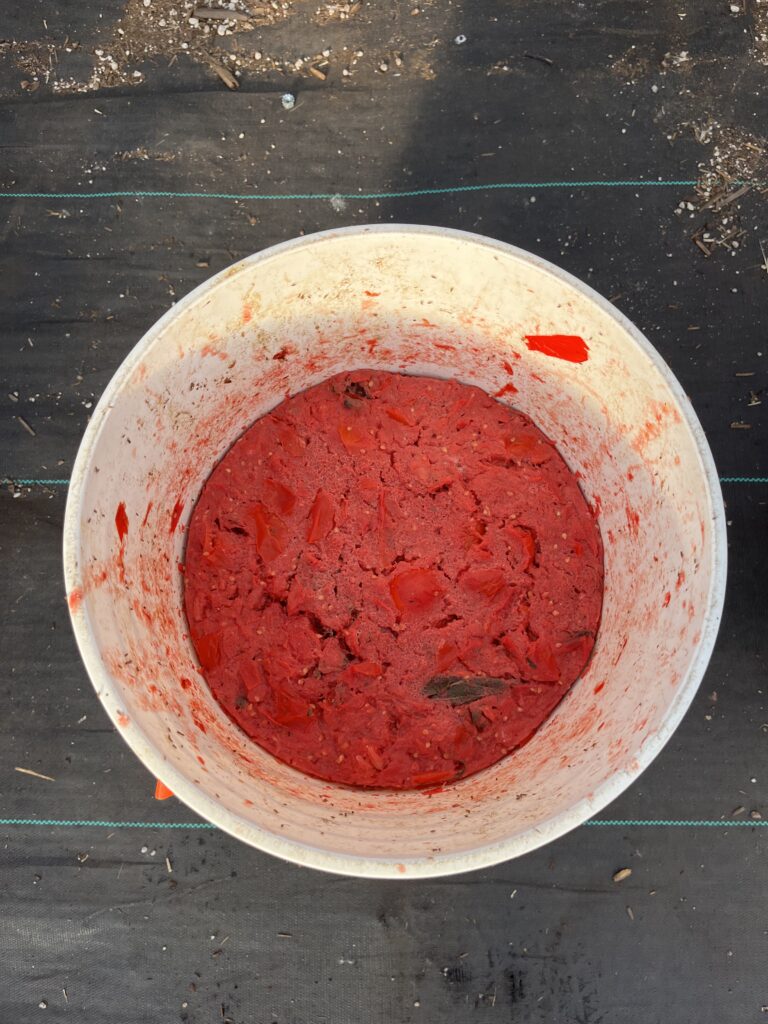
2B: Monitor and Stir
Place your container of mashed, crushed, or extracted seed in a warm location, ideally between 72-86F (22-30C). Depending on temperature and seed variety, the fermentation process can take anywhere from 48 to 72 hours. Stir the fermenting mixture two or three times a day to agitate and provide aeration.
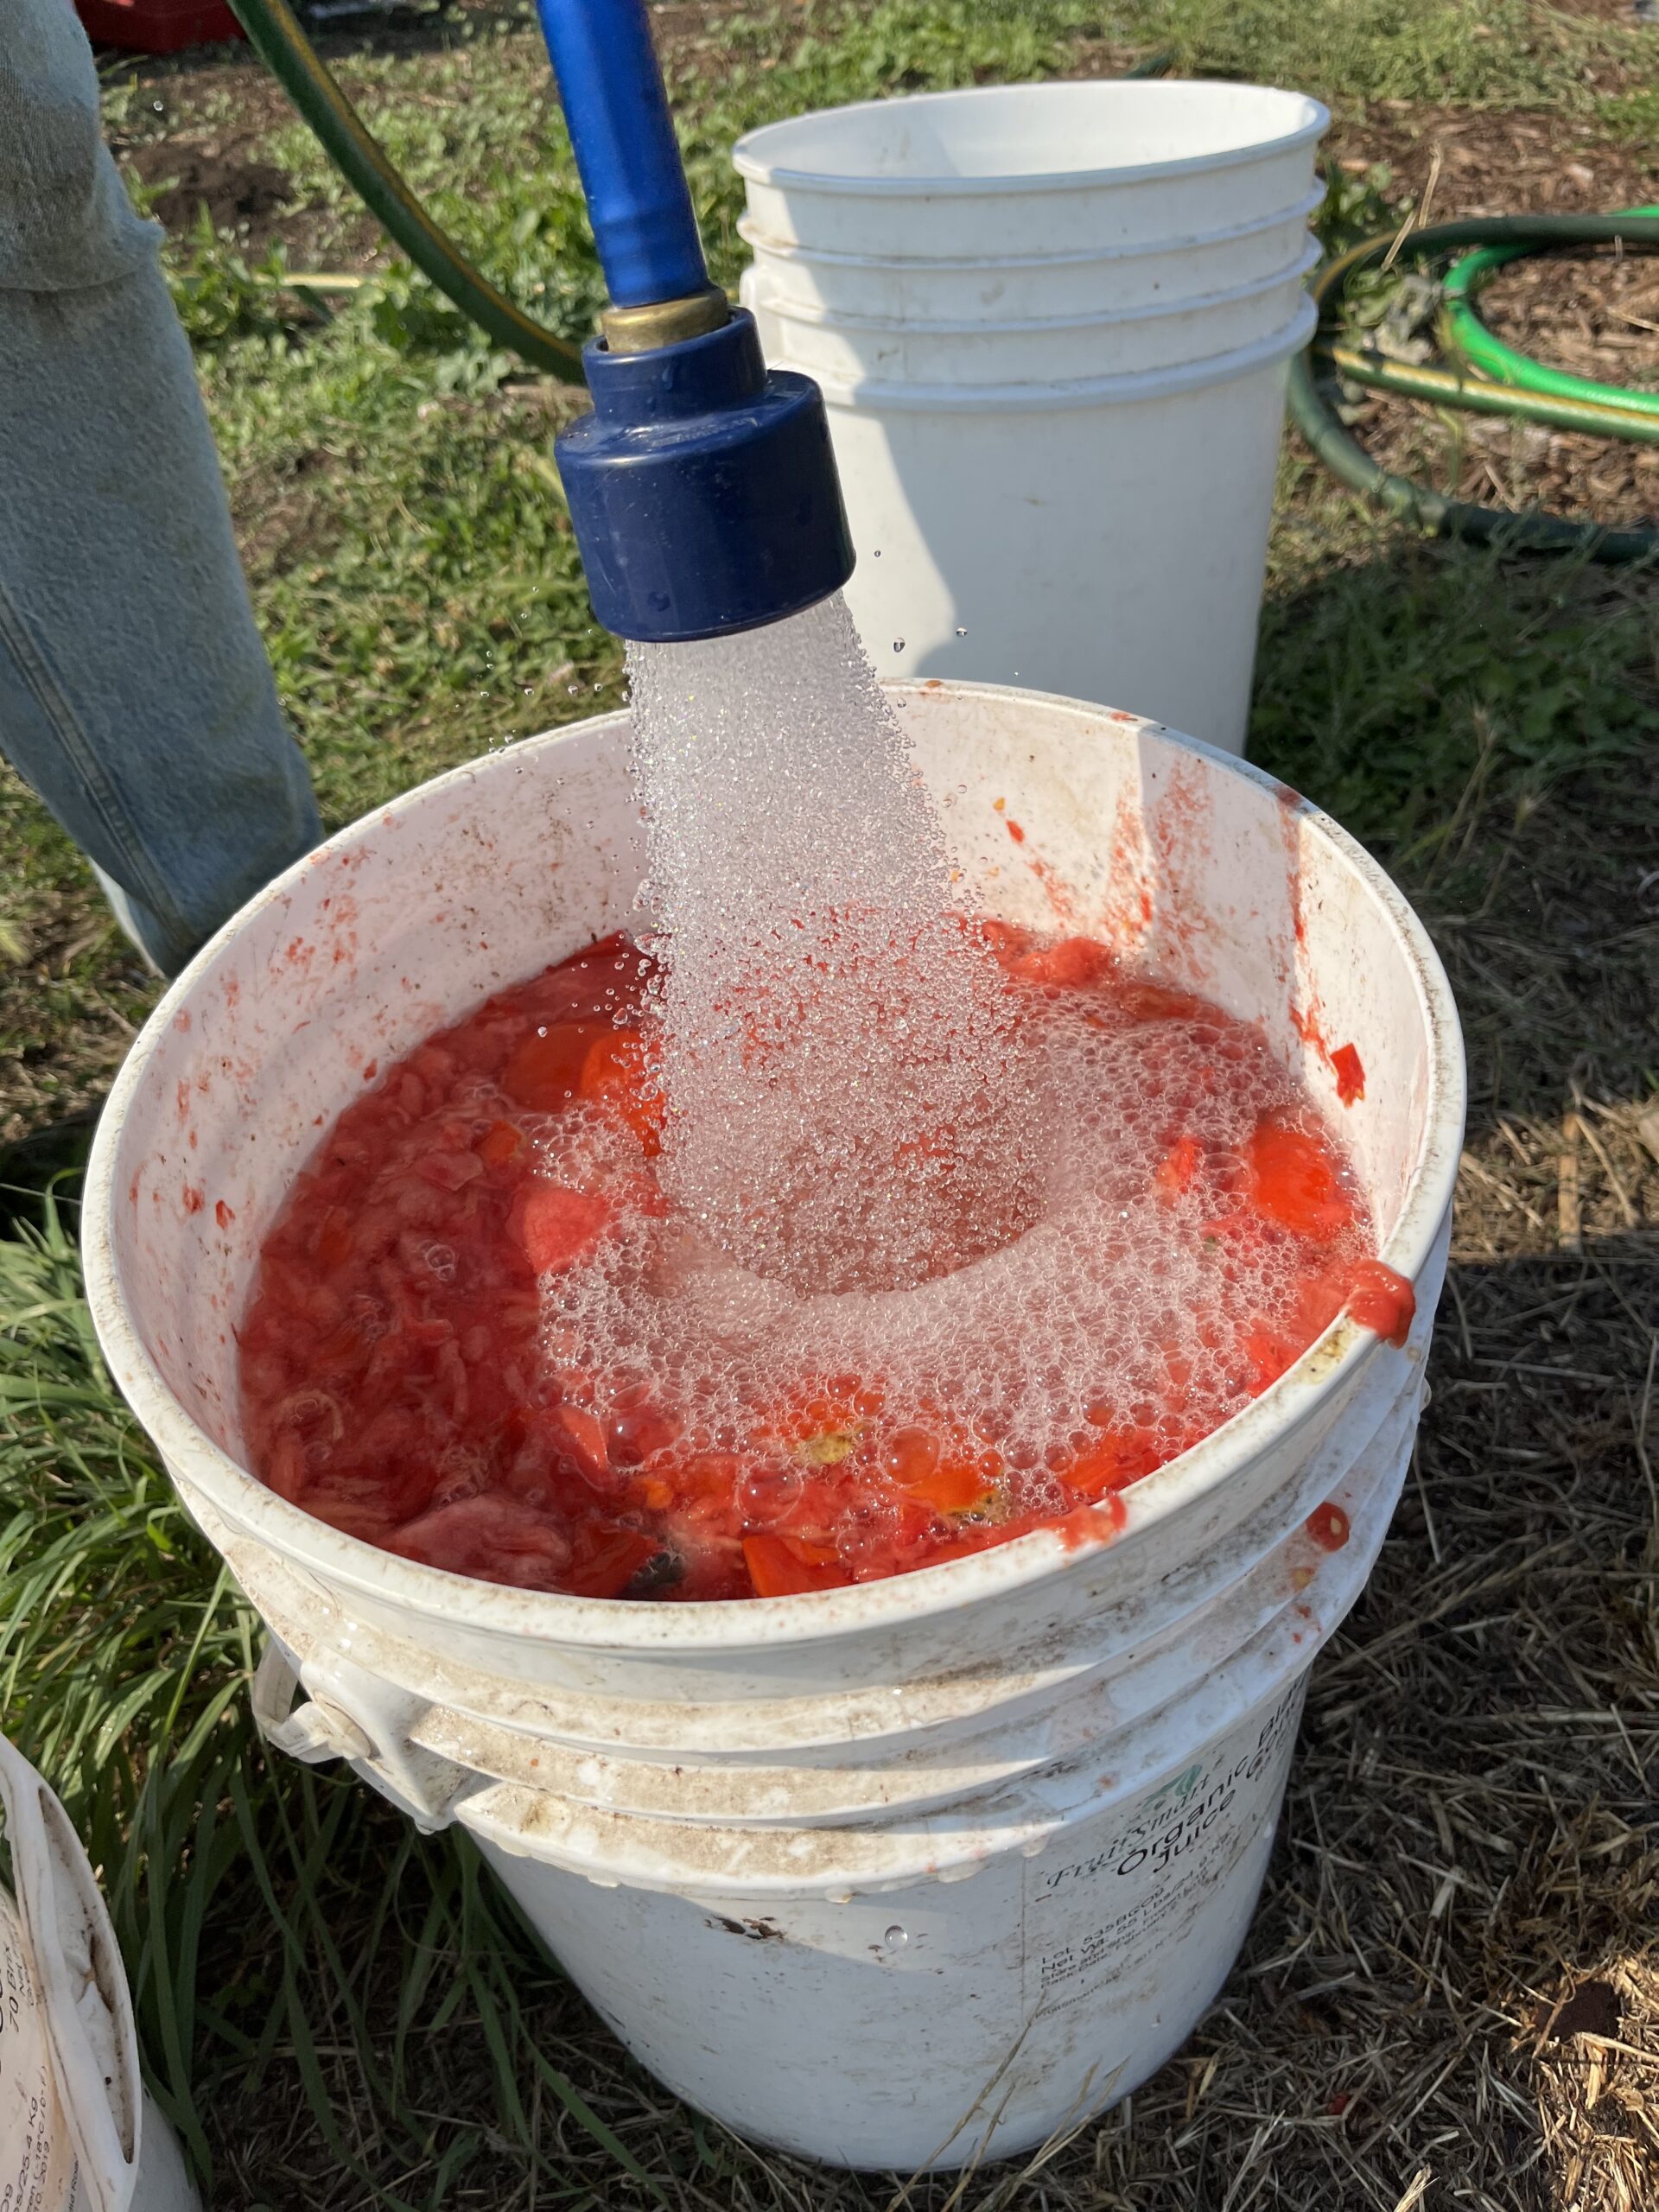
2C: Add Water
If you are doing a “light fermentation” add water and allow seeds to soak. This will help break up the gel, which then seems easier to separate from the seed. Make sure to pour off water after 8-12 hours to prevent early germination and damage to the seed coat. When fermentation is complete, decant and rinse.
Step Three: Decanting
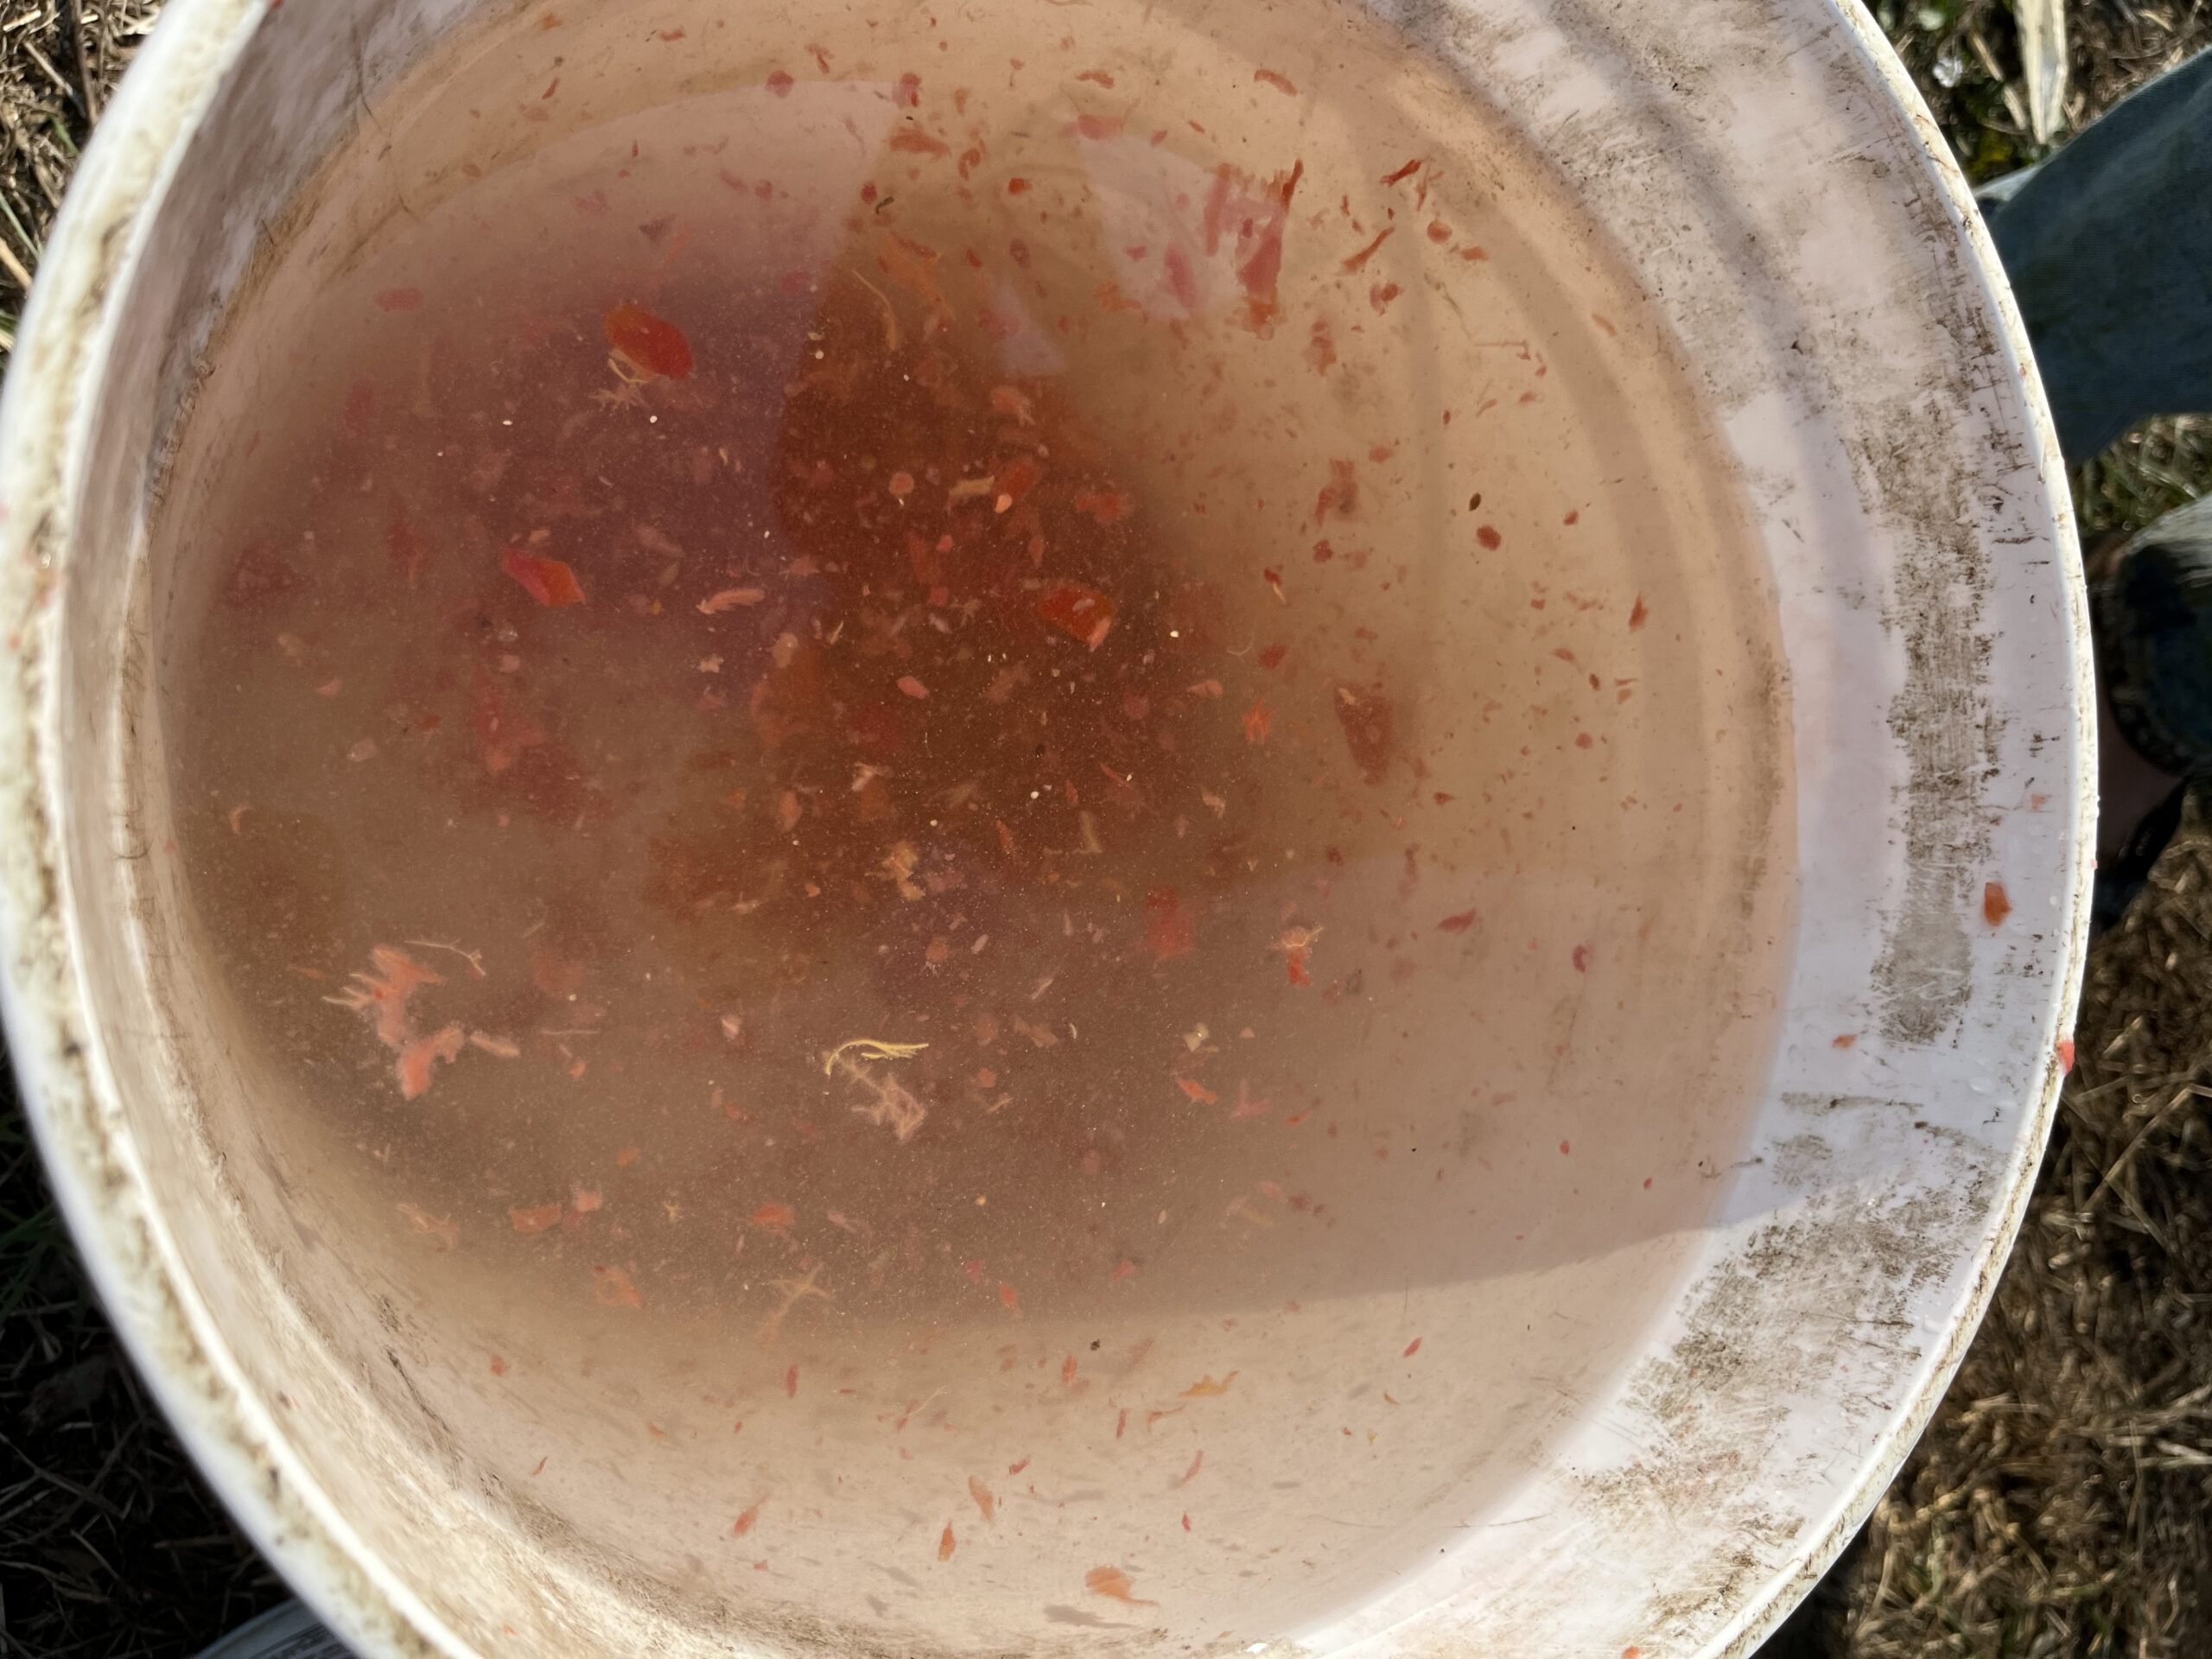
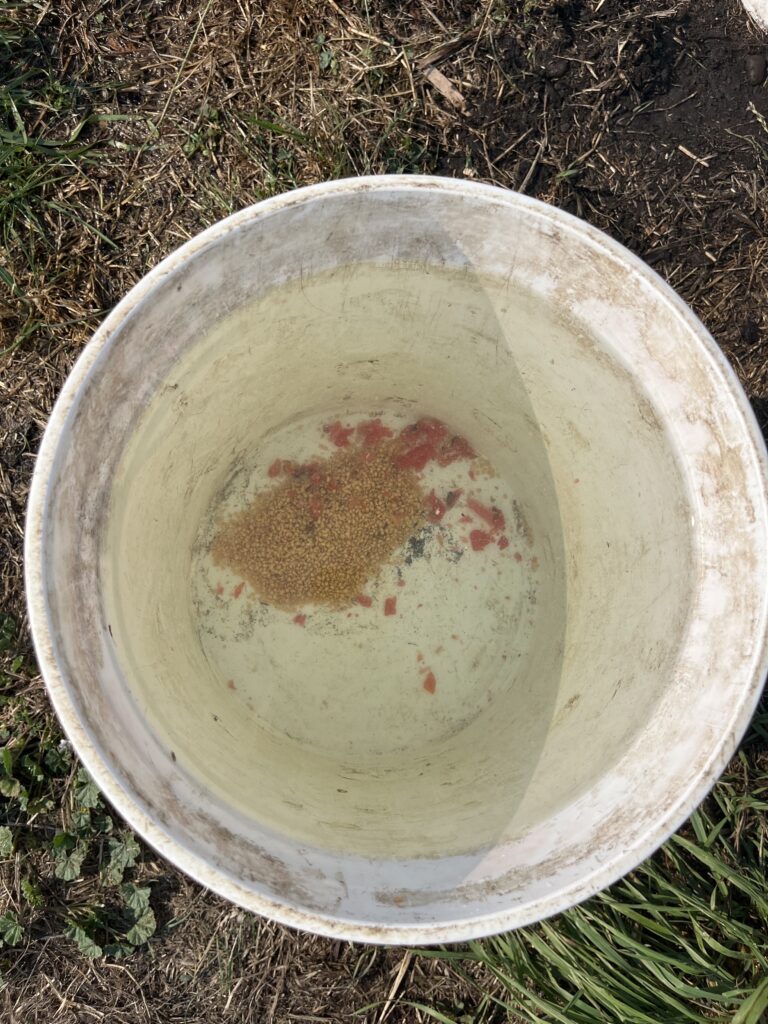
Decanting is the process of using water to clean and separate seeds from a fermentation mixture. By adding water, you are diluting the mixture and encouraging the viable seed to sink to the bottom and the non-viable seeds and the remaining pulp to float to the top. The debris and immature seeds can be gently poured off, leaving you with clean seed at the bottom of your container. To decant, follow these steps below:
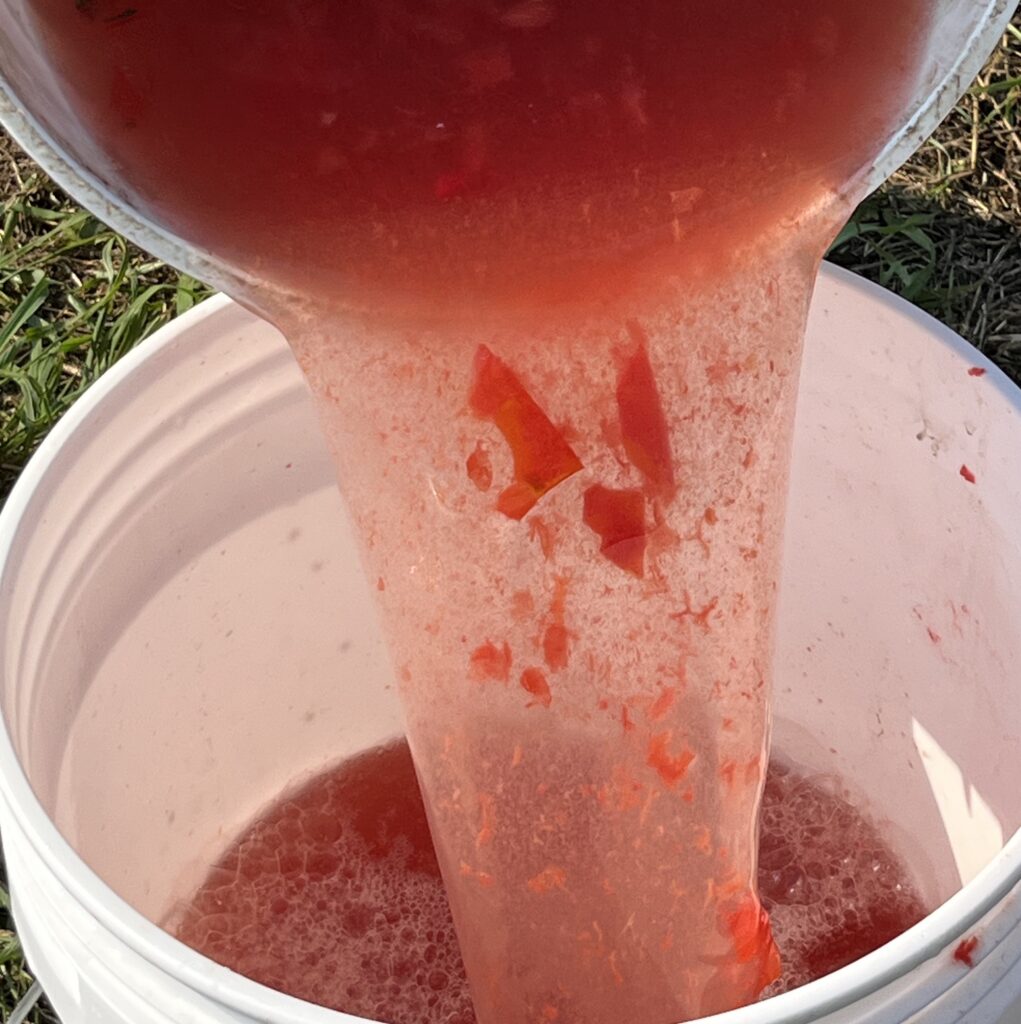
Agitate
Agitate fermentation mixture in a bucket, tote or large trash can or barrel to encourage seed to break free from pulp and other plant material.
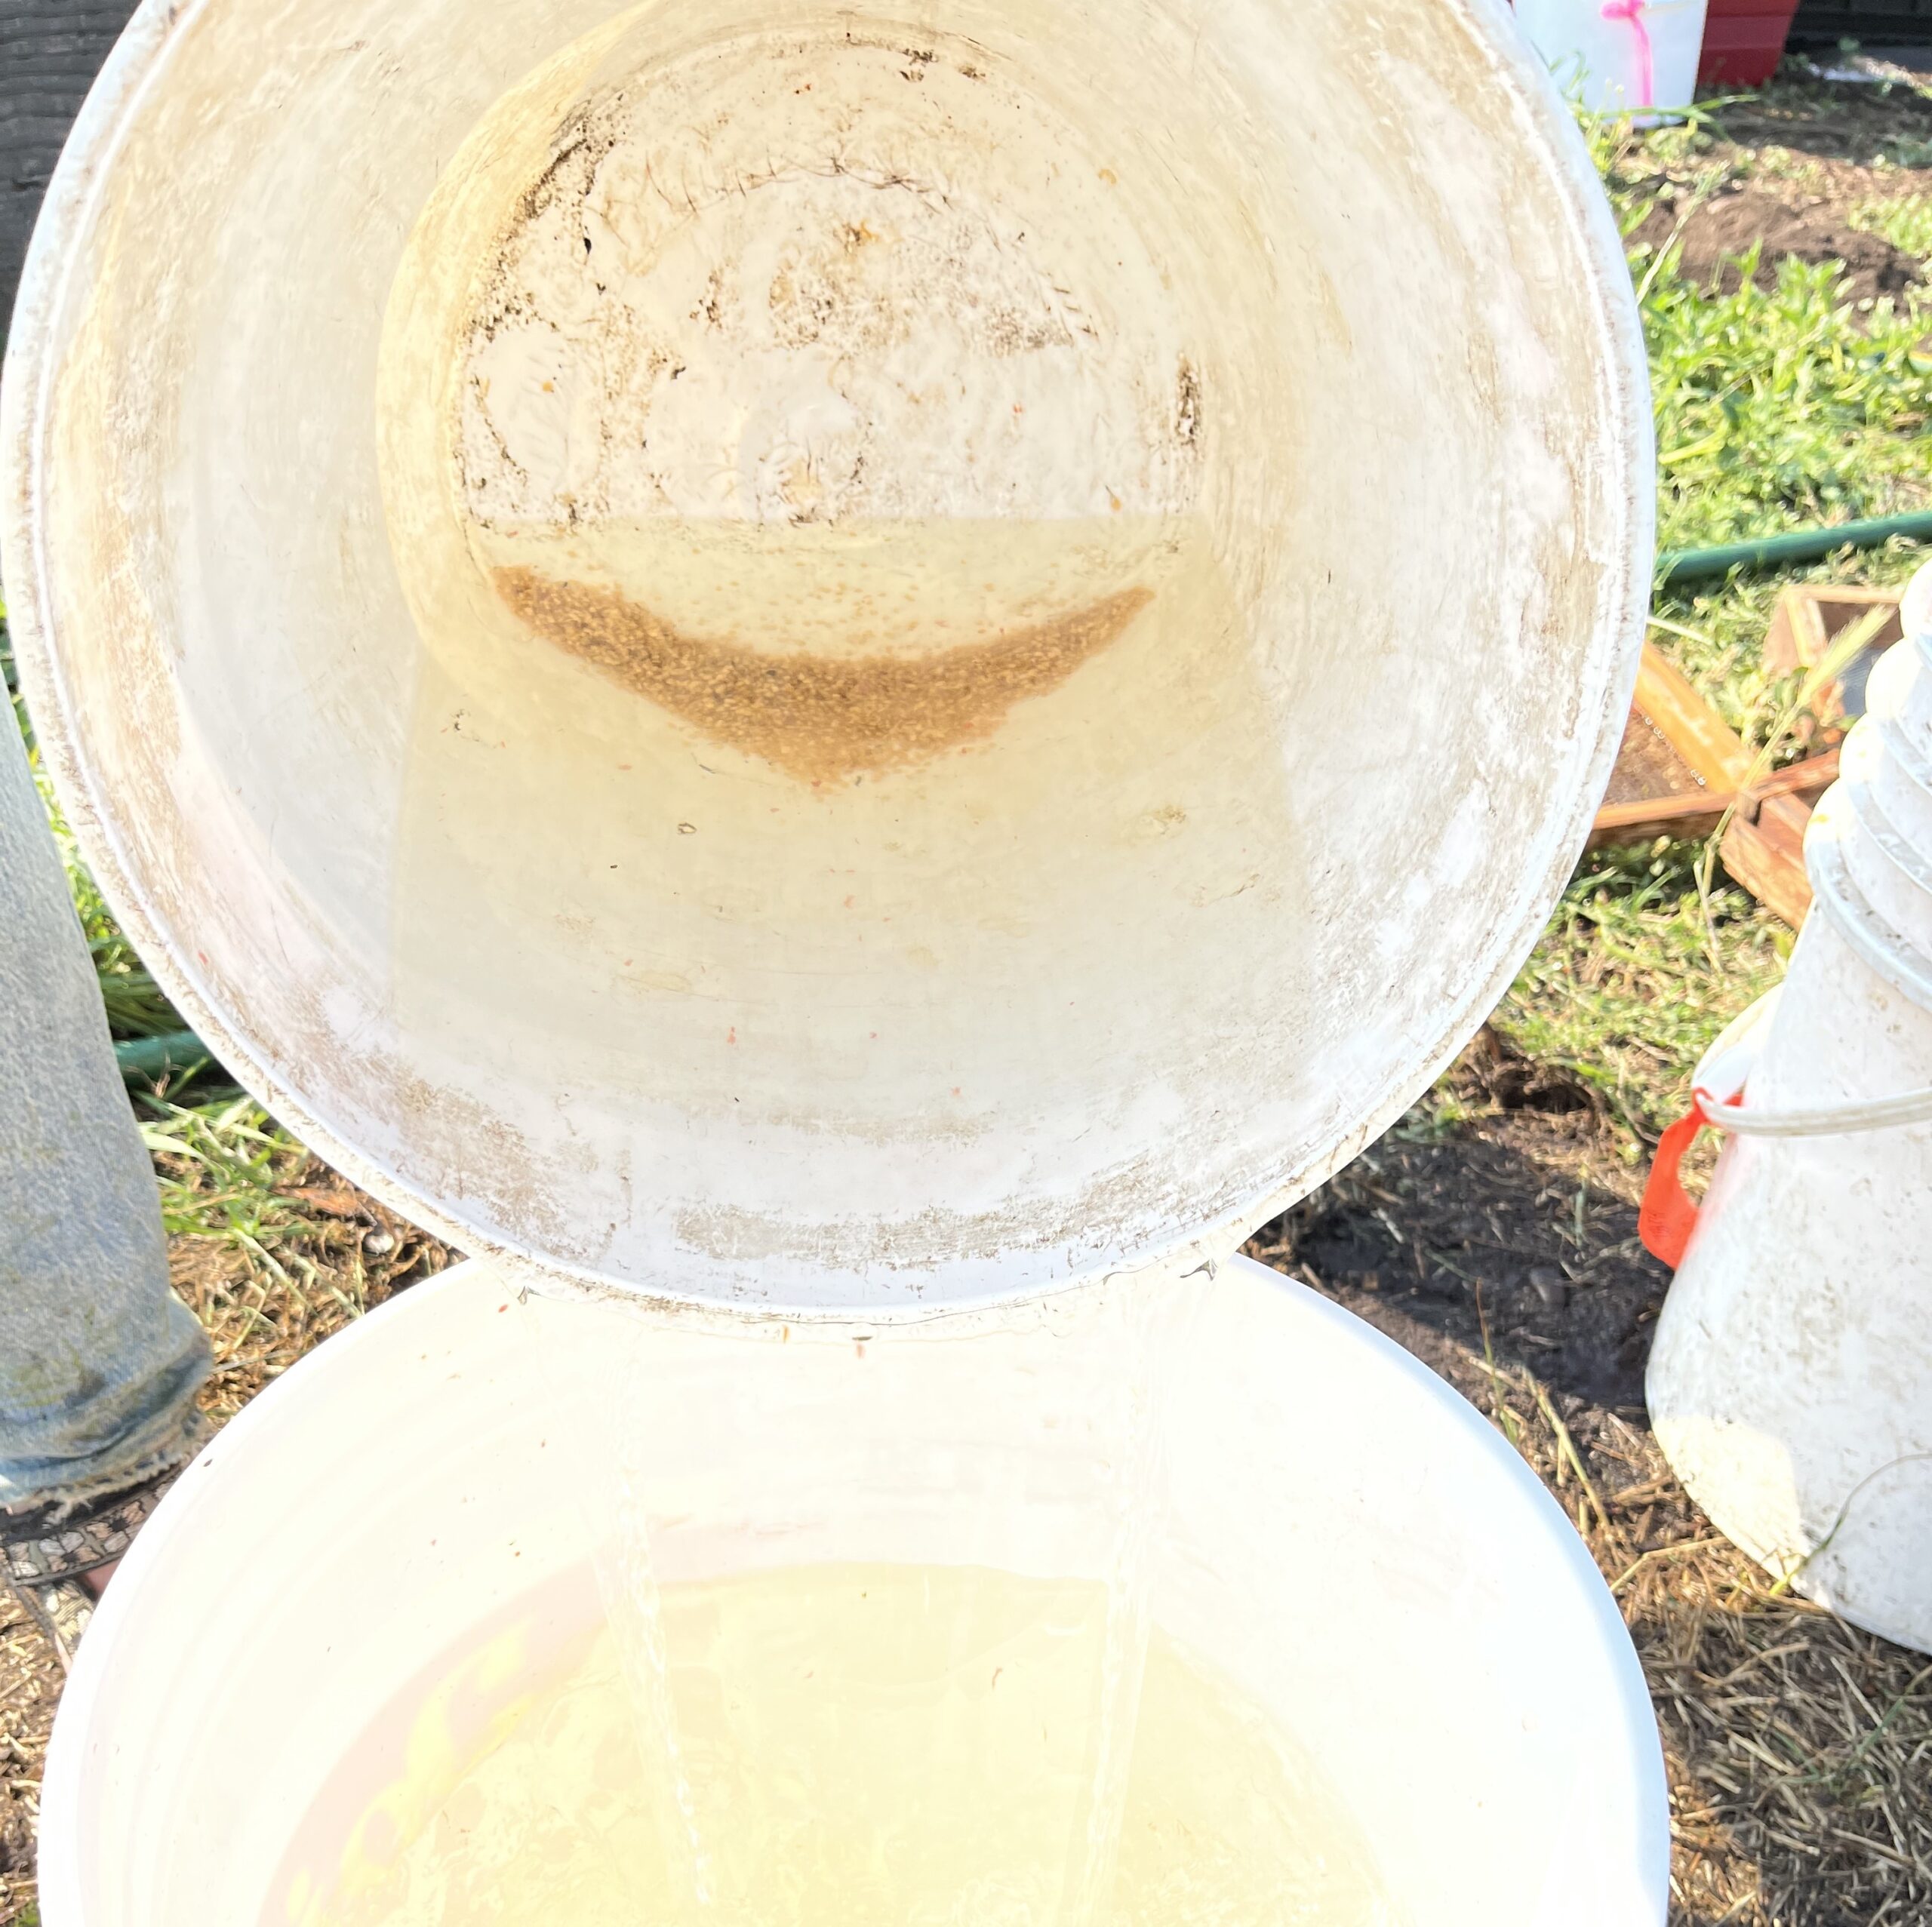
Pour
Once the seed has settled, gently pour off the layer of lighter seed and pulp that’s accumulated at the top. Repeat steps 2-3 until only dense, clean seeds remain and the water looks clear.
Rinsing with Screens
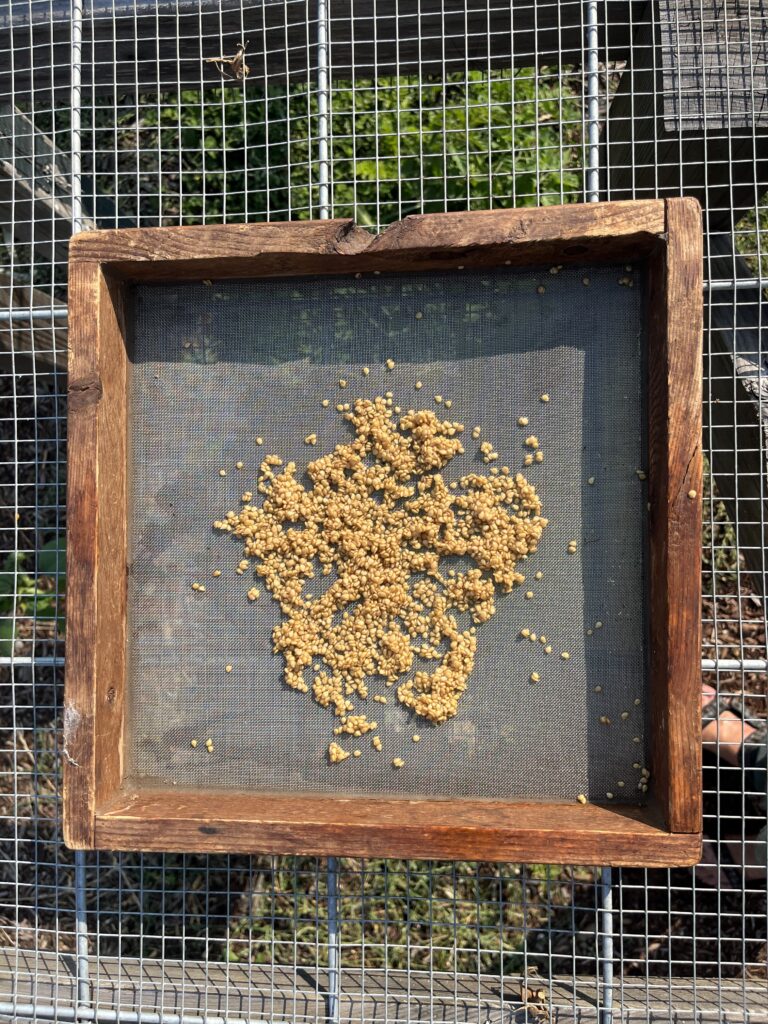
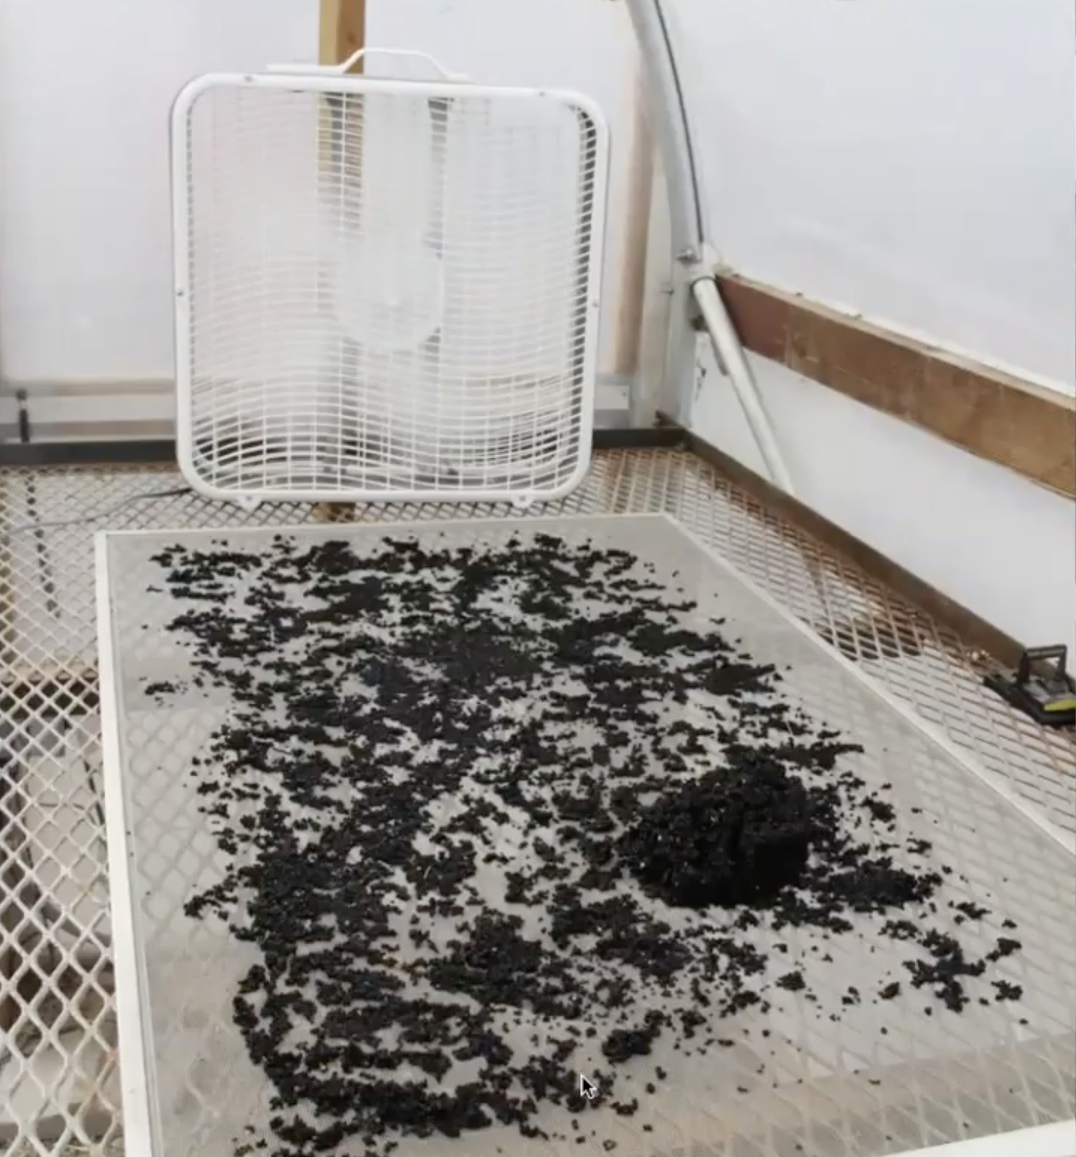
Before decanting large cucurbit seeds, pour your seed mixture onto a ½” screen to remove large pieces of leftover flesh and pulp. Most cucurbit seeds will fall through ½” screen so make sure to have a container or ¼” screen to catch the seed underneath. Spray seed with a hose to remove remaining pieces of pulp and plant material. Once clean, leave seed to dry on a ¼” screen or transfer to a finer mesh screen or scoop into a bucket to decant if necessary. Remember to spread seed out evenly and set up a box fan directly facing the screen when ready to dry.
Basic Tools Needed
- Buckets, totes, trash cans or barrels for ferments and decanting.
- Various screens: ½” for removing pieces of flesh and pulp from large seeds in the cucurbit family. ¼” for rinsing and drying. Window screens for drying small to large seeds. ⅛” screen for removing small plant material from smaller seeds such as tomatoes, peppers and eggplants before or after decanting.
- Tools for extraction: homemade mashing stick, paint mixer for mashing fruit and mixing ferments, machete, ax knives for cutting fruits
- Blender for crushing small fruits
- Tarps to prevent seed loss when extracting
Mechanized Cleaning Options
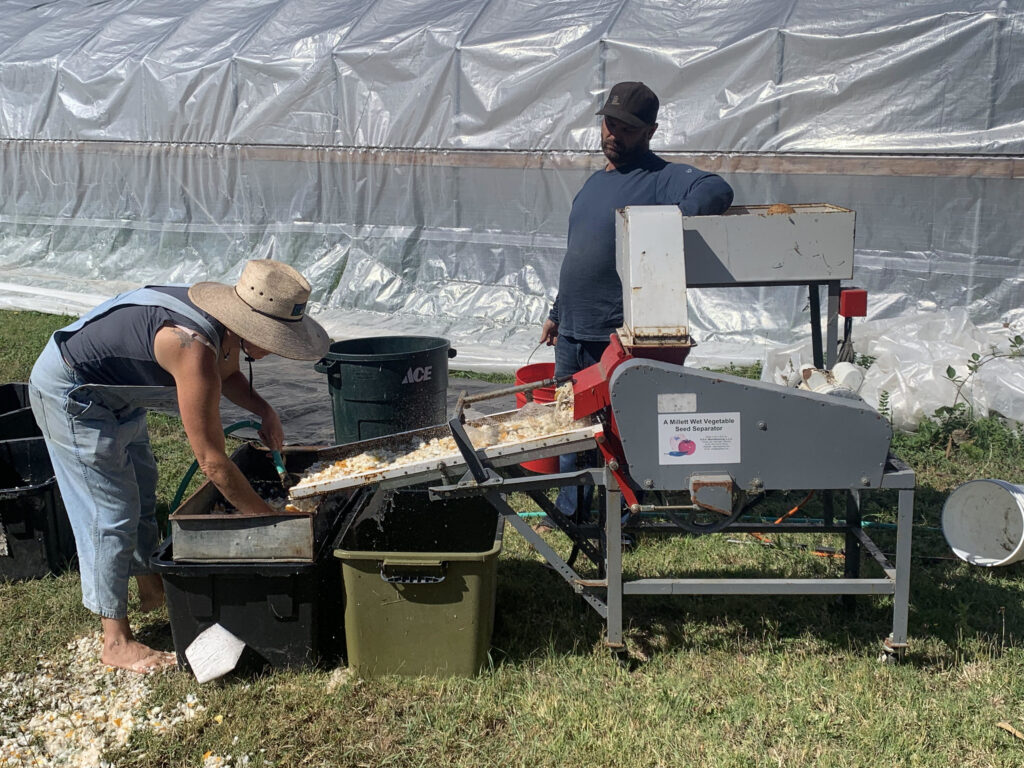
Millett Wet Vegetable Seed Separator
The Millett Wet Seed Separator (Millett) is commonly used for processing peppers, tomatoes and eggplants for seed, and, less commonly, for processing cucumbers and melons. It comes in a small and large size. According to the manufacturer’s information, the small version is capable of processing 2,000 pounds of tomatoes an hour, while the large version can process 6,000 pounds per hour. The Millett consists of a hopper where the fruits are initially added, an internal threshing unit to macerate the fruits, a sloped screen to separate the seed and juice from the pieces of fruit, and a spray arm that uses water to aid in pushing seeds through the screen.
Works best on: Tomatoes, peppers and eggplant.
www.agemfg.com
Tips for Dry Seeded Crops:
Cabbage (Brassicaceae Oleracea)
Growing tips: Cabbage is a biennial and requires vernalization to induce flowering. The ideal size for overwintering (in terms of cold hardiness) is a fully grown, but loosely formed head, before the head firms up. Cabbage plants will generally overwinter in areas that don’t drop below 20F (-7C) in the winter. In colder winter climates, cabbage plants must be dug up and stored over the winter. Choose the firmest heads and trim off loose leaves. Dig up the entire plant and clip the roots to 12 inches, leaving some lateral roots. The cabbage heads should be covered with damp sawdust. Heads may also be wrapped in damp newspaper and stored for 2-4 months at a temperature of 32-40F (0-4C) and 80-90% relative humidity. In the spring of the second year, after replanting or overwintering in the field, it may help to cut a shallow X on the top of the cabbage head to promote the seed stalk to emerge. The seed stalk will grow 3-4 feet tall and produce seed pods.
Harvest and processing tips: In Year 2 pods will start to dry and turn brown as they mature. If the seed pods are allowed to dry completely in the field, you run the risk of them shattering. It is best to harvest the mature plants when at least 75% of the pods are mature and allow them to dry completely on tarps. Cut plants at base and windrow onto tarps outside or indoors to dry. Thresh plants by stripping pods and rubbing gently to crush pods and release seeds. Continue removing the remaining chaff and plant material by screening and winnowing.
Onion (Alliaceae, Allium cepa):
Growing Tips: Onions are a biennial crop and require vernalization. They can benefit from staking in the field.
Harvesting and Processing Tips: The mature seed of onions is a dull black color, hard and completely dry. A good rule of thumb is when there is a patch of black seed showing at the top of the umbel (around 50%) it’s time to cut the crop. The most common method is to cut the umbels individually leaving about 6 inches of the seed stalk attached. The later maturing seed will use the moisture from the seed stalks attached to the umbel to continue maturing. Move material onto a tarp or screen to continue drying. Make sure layers are no more than 2 feet deep and flip layers daily to encourage airflow. Once all of the umbels are dry, check the seed for full maturity by biting or cutting into the seed from the lower parts of the umbel. The seed should be completely dry. If the endosperm is not fully ripe the inside of the seed will be soft or “doughy”. This soft seed is very easily damaged during the threshing process. Onion seed should be threshed very carefully as the seed coat is very thin. Aggressive threshing can lead to microscopic cracks in the seed coat that greatly diminish storability. Because onion seed shatters very easily, seed can be extracted by beating the umbels on the inside of a plastic trash can or container. A great deal of seed generally shatters on the screen or tarps so make sure to carefully collect seed from these surfaces. A good, quick way to check onion seed for initial quality or to clean small parts of dry matter is to add the seed to a bucket of water. Good seed will sink. Poor seed and small plant material will float and can be poured off. Wet seed should be quickly laid out in a thin layer to dry with good air circulation.
Floating onion seed video link: https://drive.google.com/file/d/12ULZf07_s51nJ-9-3qrY9h21lpxCeCb4/view?usp=drive_link
Carrot (Apiaceae, Daucus carota)
Growing tips: Carrots are a biennial and must acquire vernalization to flower. The ideal size for overwintering (in terms of cold hardiness) is about 1” wide at the crown. Carrots benefit from trellising/staking in the field.
Harvest and processing tips: Carrot seed crops usually mature from mid-August to mid-September in the Western Region. The king or primary umbel is the first to ripen. The seed will turn from a dark green to brown and will actually begin to detach from the umbel. Carrot seed has racemes, or little hooks that cover the seed and they often latch together and remain on the umbel surface. Much of this seed can still be lost to shattering. The secondary and tertiary umbels that form after the king umbel will ripen anywhere from a few days to a few weeks later. Although it can be worth harvesting the secondary and tertiary umbels, it’s important to note that the seed from these umbells tend to be lower in quality compared to the primary umbel.
Good quality carrot seed is generally plump and heavy. One way to check initial seed quality is to rub a small sample in the palm of your hand using a fair bit of pressure on the seed. Good seed will remain intact while poor seed will crush and break apart. When about 80% of the total seed has turned brown and detached from the umbel you can begin harvesting. One approach is to harvest umbels individually as they mature. However if umbels have reached maturity at the same time, you can swath and windrow outside to dry if your climate allows. Carrot seed is light in comparison to the bracts and stems that are attached to the umbel so be careful to not over thresh the material as it will be difficult to separate the small pieces of stem from your seed later on. To remove seed, gentle rub umbels with your fingers or against a screen.
Beets (Chenopodiaceae, Beta vulgaris)
Growing tips: Beets are a cool season crop and are best grown in areas with mild temperatures (below 75-80F/23-26C) during flowering. Beets are biennial and require vernalization to flower. The ideal size of the root for overwintering (in terms of cold hardiness) is 1-1.5in diameter.
Harvest and processing tips: Beet seed crops from second year roots mature in approximately 140-160 days depending on variety, climate, and planting date. Since beet seed matures sequentially, the percentage of beet seed reaching full maturity at the time of harvest will usually not exceed 75%. An early harvest may result in a percentage of seed that is not fully mature while harvesting seed past the optimum time may result in a reduced yield due to shattering and disease. One way to judge the maturity of a beet seed crop is through color. When at least 75% of the seeds on a plant have turned a tannish brown shade it’s time to harvest. It’s also important to note that the color of mature beet seed can vary between beet varieties. Some beet varieties may retain greener hues than others even when fully mature. In this case, it can be good to refer to a seed packet to determine what color you are looking for when it comes time to assess maturity. When ready to harvest, cut or swath plants at the base and windrow on a tarp to dry. Make sure to flip material daily to promote airflow. Once plants are fully dry, strip by hand, flail into trash bins or use mechanical threshing options if available. After threshing, continue with screening and winnowing.
Spinach (Chenopodiaceae, Spinacia oleracea)
Growing tips: Spinach is a cool weather annual. It must be planted in early spring in order to grow a large enough plant before bolting to produce a good seed set. Spinach flowering is triggered by increasing day length. Spinach seed requires a unique climate limited to cool, wet springs followed by cool summers (temperatures not exceeding 75F) and relatively dry late summers and early fall weather for harvesting. Especially during pollination and early seed development, temperatures that exceed 75F (24C) can dramatically lower germination rates, seed size and yield.
Harvest and processing tips: Spinach seed is ready for harvest when 75% of the seed is a brownish color. To assure maturity, the seed can be cut open and inspected for its color. The plant is mature when the majority of the interiors of these seeds are a starchy white color. When ready to harvest, cut the plants at the base of the stock and windrow to dry. Make sure to flip spinach plants daily to encourage airflow as it dries. Once dry enough to thresh, strip stalks by hand, flail into a trash bin or use mechanical threshing options. Spinach seed tends to form in clusters so it may be necessary to thresh aggressively to break apart the seed.
Corn (Poaceae, Zea mays)
Growing tips: Corn is highly susceptible to inbreeding depression so maintaining a large enough population is essential. A good seed set requires adequate application of pollen to the silks (style and stigma). For this reason corn benefits from planting in a block rather than long, narrow rows.
Harvest and processing tips: Allow ears to develop and dry out on the stalk for as long as possible. Once mature, husks should be dry and easy to peel. After harvest pull back husks and continue to dry if necessary. Dry ears in a rodent proof zone by hanging or placing on screens with adequate airflow. Once completely dry, remove kernels using a corn sheller. Follow up with screening and winnowing to remove remaining plant debris and broken kernels.
Tips for Wet Seeded Crops:
Zucchini (Cucurbitaceae, Cucurbita pepo):
Harvesting and processing tips: Allow zucchini to mature on the vine for as long as possible. Harvest before the first hard frost and store at 65-75F for a few weeks to cure. This will allow the seed to fully ripen and will improve the overall quality of the seed. After the curing period, extract the seed from the zucchini by splitting the fruit in half with an axe, machete, or tool of choice. Scoop out the seeds into a bucket or trash bin. At this stage, you can pour the seed onto a ¼” screen to rinse and then follow up with decanting. If pulp is difficult to remove, try adding water and do a light soak for 8-12 hours. By soaking the seed mixture you are encouraging the pulp to break down making it easier to remove in the rinsing and decanting process. Spread the clean seed out evenly on a drying screen with box fans to provide airflow. When the seed is adequately dried it will be easy to snap in half with your fingers. Last, winnow the seed to remove the remaining non-viable and broken seeds.
Pepper (Solanaceae, Capsicum spp.):
Harvest and processing tips: Peppers are ready for seed harvest when their color development is complete and uniform. Most pepper varieties are completely red when they are ready for seed harvest, but others are yellow, green, orange, purple, or brown. Peppers are particularly susceptible to disease, and can be moldy in the core even when the outside of the pepper looks healthy. The cores should have no mold and the seeds should be ivory, yellowish, or orangish; brown or very dark seeds are non-viable and diseased. For maximum seed quality, store peppers that have reached complete color development at about 65-75F for 7-10 days before extracting the seed. To extract seed you can blend fruits with water in a food processor (use a thick plastic blade, or wrap tape around metal blades to avoid damaging seeds) to thresh, decant and rinse. Another option is to crush peppers and let them soak for 8-12 hours. Follow up with screening, rinsing and decanting. When decanting peppers it’s important to note that because of the seed shape, it can take longer for the good seed to settle at the bottom. Prevent seed loss by giving the mixture additional time to settle.
Tomato (Solanaceae, Solanum lycopersicum ):
Tomatoes can be harvested for seed when they are ready to eat and have full color development. Tomatoes are particularly susceptible to seed borne diseases so make sure to toss out fruits that are showing any signs of disease before you process. If your goal is to maximize the number of mature seeds, harvest the fruits when they are fully mature and begin to soften. Harvest into buckets and mash fruits using your preferred tool or a method provided in this Seed Toolkit. Store ferments in a warm, dry space (72-86F) and stir twice a day. Allow tomato mixture to ferment for 2-3 days depending on your climate. Once the fermentation period is over, follow up with standard decanting procedures and adequately dry your seed. Once the tomato seed is fully dry, rub on a screen to break apart seed clumps and winnow to remove any non-viable seeds.
Watermelon (Cucurbitaceae, Citrullus Lanatus):
Harvest and processing tips: Once watermelons are ready to eat you can harvest the seeds. If you’re not concerned with eating the fruit, allow the fruit to mature on the vine for as long as possible. Harvest the fruits and let them cure until they begin to soften. When you are ready to extract the seeds, cut the fruit open and scoop seeds into a container. Next, rinse seed over a ¼ screen to remove remaining pulp and flesh. If necessary, do a light soak for 8-12 hours and then rinse and decant to remove pulp easily. Once the seed is clean, spread evenly on a screen to dry along with box fans. After the seed is fully dry, winnow to remove left-over plant material and non-viable seeds.
DIY Equipment Options:
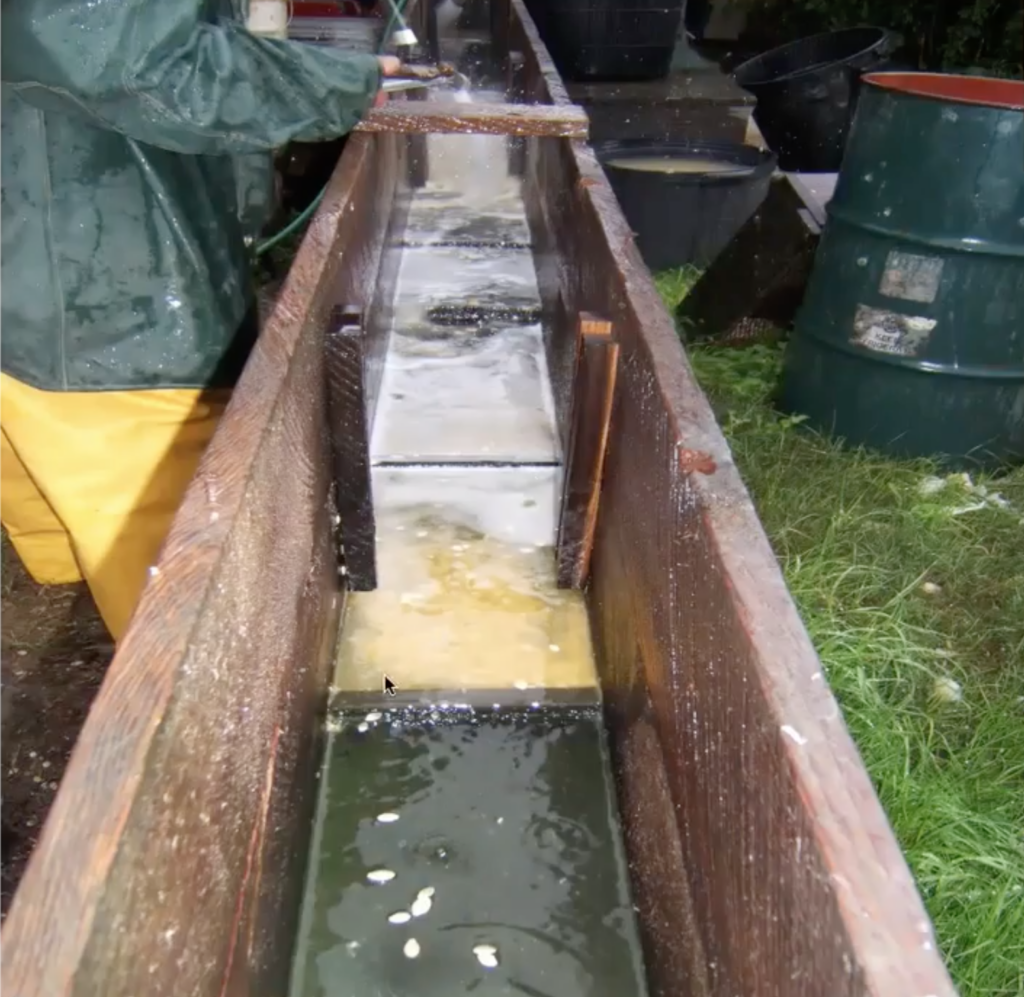
- Create your own Sluice box
https://drive.google.com/file/d/1RJN0dQd-0kVrzwiFkfpbgA9jvrAH91-9/view?usp=sharing
Seed Cleaning Equipment
Check out our Seed Cleaning Equipment guide for a detailed selection of various equipment available for Drying, Threshing, Screening, Other Equipment, Winnowing, Wet Seed Extraction, Testing, and Storage of seeds.
Resources
Seed Cleaning Webinars:
- Washington Seed Summit: Seed Equipment Workshop (2021).
- Seed Cleaning English and Spanish version (2016).
- Small to Medium Seed Cleaning Equipment – Washington Organic Seed Summit (2023)
- Organic Seed Growers Conference: Small to Medium Scale Seed Cleaning Equipment (2022)
Other:
